Planning
Properties, renovation, conversion, all terms that we have become more and more familiar with. Programs on television, articles in magazines, all add to the idea that there is little or no effort that cannot be spared to produce, at the very least, the home and the lifestyle of ones’ dreams. This is the first instalment of a realistic tale of how we changed a barn into our family home.
Anybody considering a renovation or conversion project on property in France will probably understand that the “paper chase” involved can be daunting. This can be evidenced by the officialdom involved in actually buying a property. This, compounded by language problems, could dampen the enthusiasm of even the most committed person.
When we bought our barn we were determined that, as much work, as possible, would be undertaken by ourselves. Our barn had the advantage of already having in place a ‘certificat d’urbanisme’. This initial piece of documentation is vital as it details what you can do with your buildings and land, as well as what you cannot do. From this point we set about gathering information as to how we could apply for planning permission to convert our barn into our house. We listened to loads of horror stories, consulted architects and investigated various ways forward. At this point we decided to forgo the service of an architect on two counts. The first one being cost. We were quoted 3000 Euros plus TVA for an initial planning permission submission. Figures for managing the project would have been in the region of 10% of total build cost ! The second reason was something a little vague, but to us as important. We felt that by using an architect we were giving up, at the outset, a slice of ownership of the project.
Contrary to popular belief as an individual you can produce all documentation requisites. Planning dossiers, although complex, require a methodical approach, an ability to draw and a sympathetic ear to what is actually required in the finished renovation or conversion. All of these, I think, I have so I used them. With imagination and drawing expertise we managed to submit a planning dossier which, within eight weeks, was approved and returned. We were on our way.
If you feel that you would like to use my expertise on your project please feel free to contact me via the form on this page.
Project Management
The previous article left us at the stage where we had obtained planning consent for our conversion. The vision of what we wanted now existed in two places; in our imagination and in two dimensions on four sheets of A1 sized paper, which were suitably stamped as approved by the local Mairie. Information regarding what a planning dossier consists of and copies of the relevant forms, from the french government website, can be found here.
The exercise that is “taking stock” has a lot to commend it. At this stage anybody can look at such a project and turn it into a mammoth undertaking. And then it hits you, your earlier decision to retain “ownership” of the project, if it means anything at all, means you are going to have to do something. It is a truism to say that ones ability to achieve anything is directly proportional to the desire to complete a task. I would even apply this to budgetary issues. The level of affordability of a project is determined by how much you want it.
A plan of a finished product can do a great deal to maintain motivation and guide the inner vision as to what is required to be done. Keeping in mind what the overall aim, and the finished product is, will give a greater sense of purpose and direction. This is a lot, lots easier to say than it is to achieve. The only advice received at this stage that I am prepared to pass on is this: Decide what it is you want to be on a particular day and concentrate on that role.
The simple thing of looking at what an end result is can also be applied to tasks. When they are broken down, they become more manageable. As an example we knew that we were going to have a Fosse Septique installed. We also knew from the plans where the various sinks, showers, bath and WCS were going to be located. It was then a case of planning what was actually required to join one to the others. By looking at the circumstances of our building and what we needed, it was a case of ensuring that all the necessary lengths of grey pipe, their different sizes and fittings were in position before the floor was levelled and laid. At this point I was reliably informed to “check me levels, Water and other stuff don’t flow uphill.”
Project management is a multitask occupation. The ability to perform certain jobs will depend to a large extent on the expertise of the individual. It is also true to say that the organization and acquisition of materials can be just as daunting as the physicality of the work involved. The number of suppliers that exist is too numerous to mention. What needs to be constantly kept in mind, along with price and value, is does the delivery cost of a product make it more or less attractive to drive and shop for it yourself. A bulkier item, i.e., sheets of plasterboard delivered will save loads of headache for example.
Unless you are planning something completely out of the ordinary, the chances are that somebody somewhere will have had almost exactly the same problems as you will experience. The odds of there being a book, facts sheet or even an internet solution to your problems are very high. Take the time to do the research as you go along and you will find a way forward. If you are experiencing similar problems and or headaches, talking to someone like me could be well worth your while.
What happened next?
When I set about writing the above entitled articles, the idea was that they would be a continuous story of how the work was progressing, and how this was changing our lives. As with most of these things personal circumstances changed and situations dictated that for the year to eighteen months after the third article a lot of time had to be spent away from France and, therefore, the project. As Robbie Burns said “the best laid plans of mice and men,,,,,,,,,,oft gan a glee” Well, at the very least our plans gan a gleed big time. My original thoughts with these articles was to make them into a diary of events that people could follow, if they wished, the progress of the barn as it developed. It has now become a retrospective of how and what we did .
Before I go any further a review of the first three articles, especially the first one, reveals a fact that needs up-dating. In October 2007, a comprehensive review of the planning regulations led to the implementation of new rules regarding planning and certificate d’urbanism requisites. This has simplified the procedures and given a set of parameters that allow people to understand what they can, and cannot do. It also gives a further guidance as to what is needed for all applications in a form that is fairly easy to understand. The newish requirement to use an Architects services for any development over 150 square meters of Surfaces Plancher still exists but the range of things the individual can do has been enhanced. In essence it’s simplified the jargon. (I think).
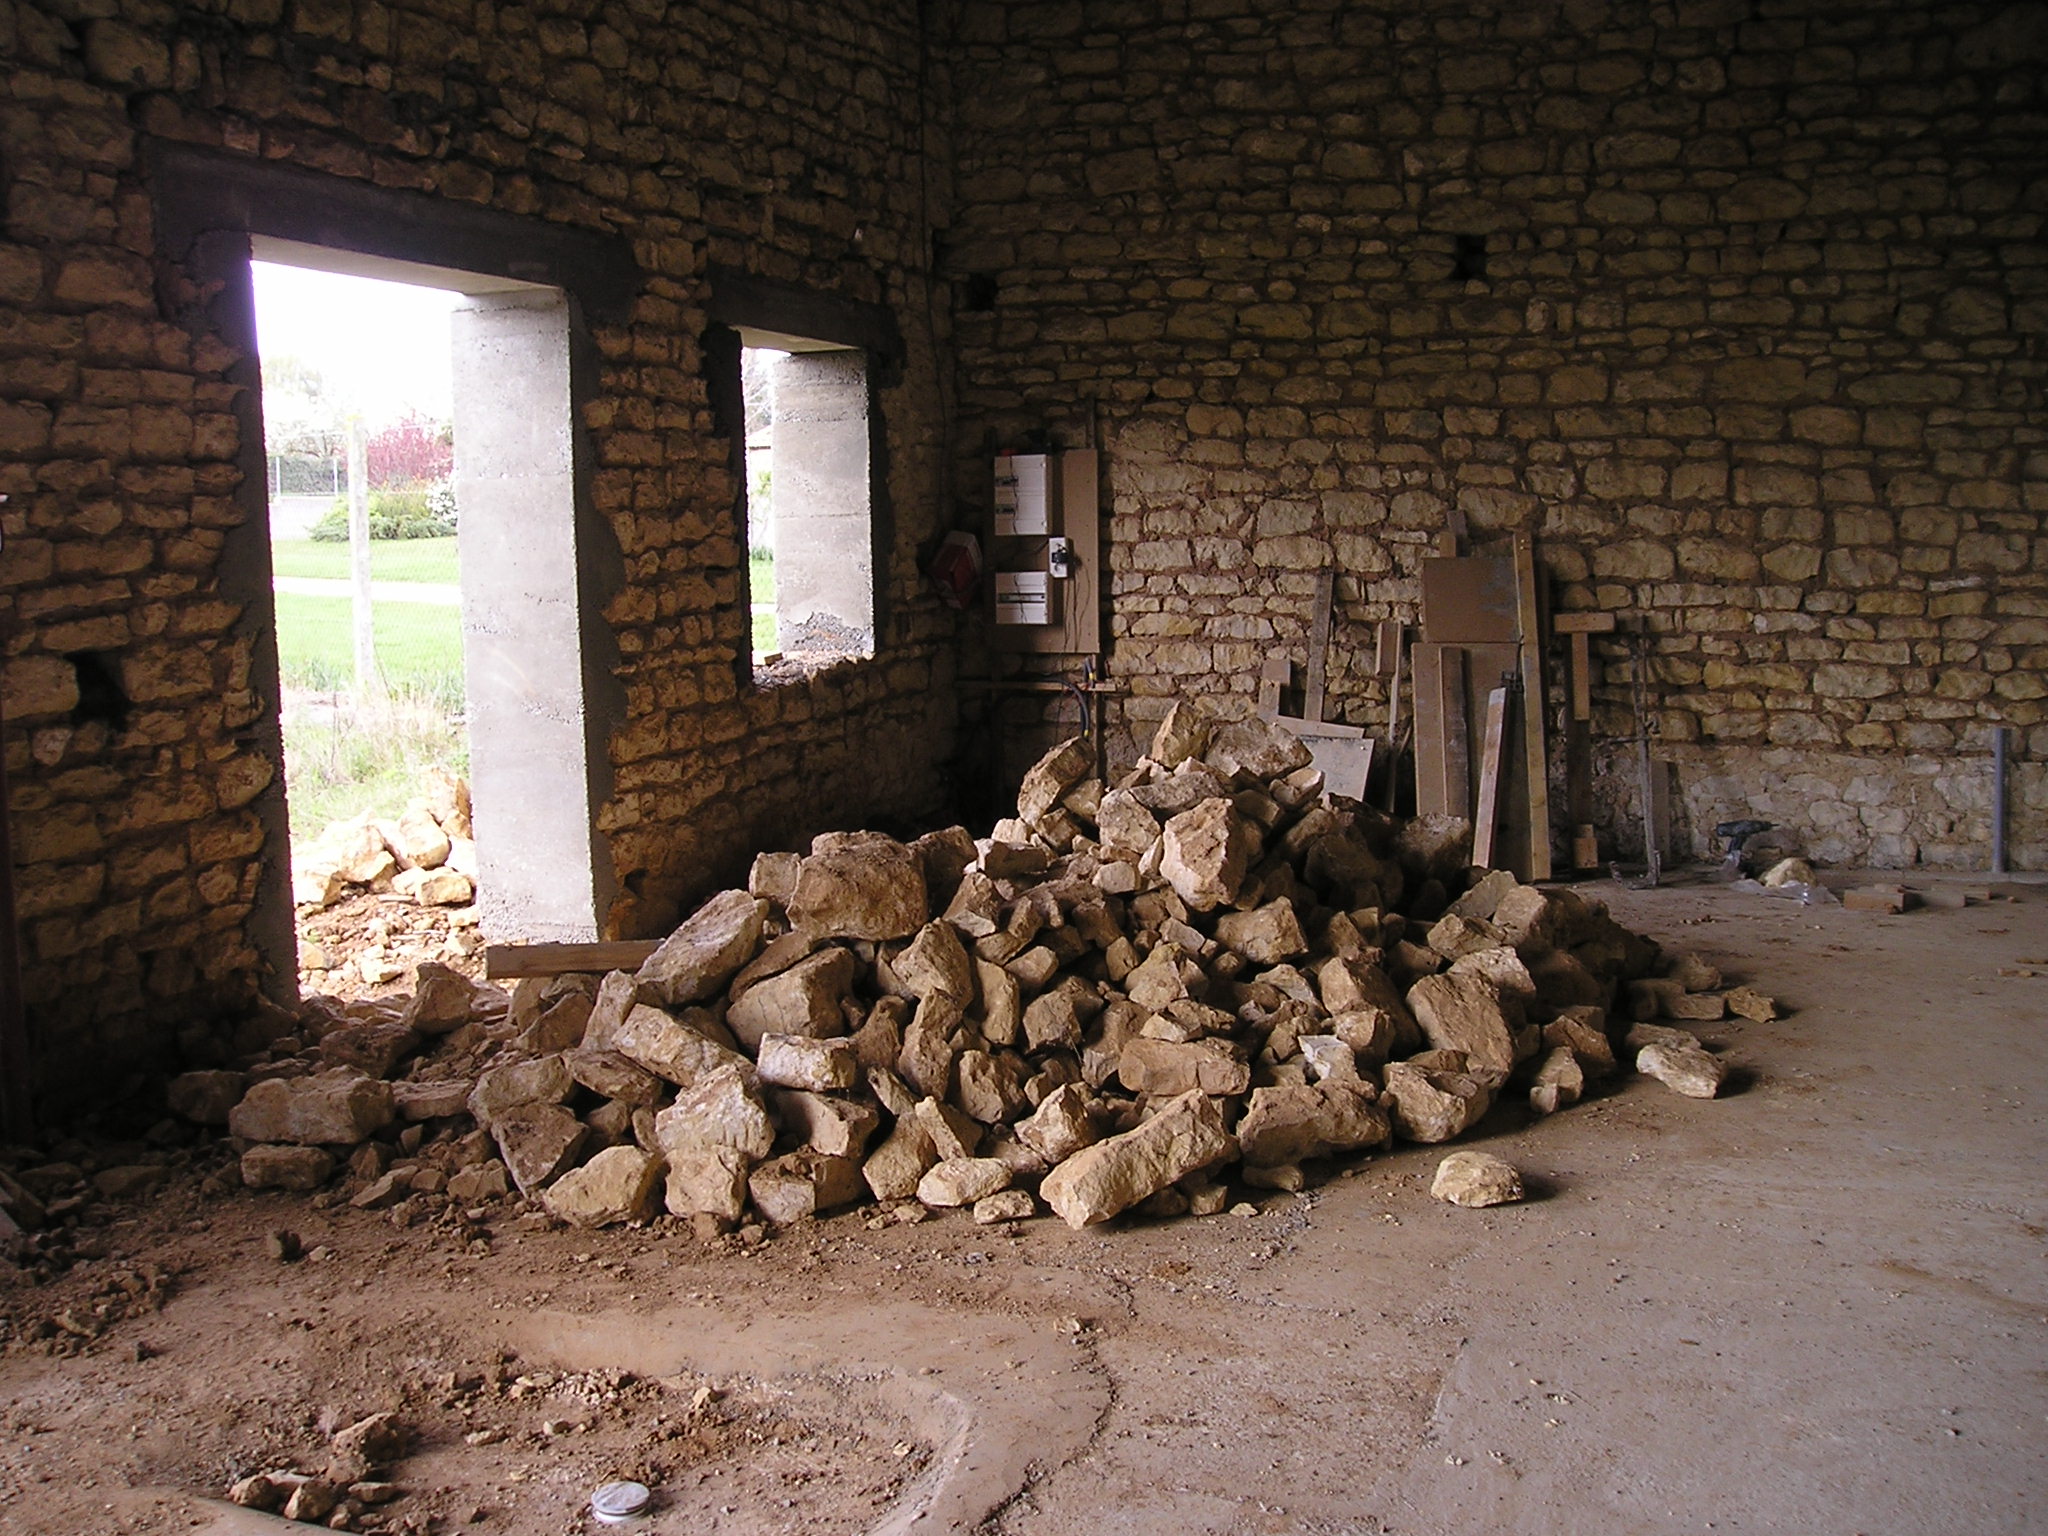
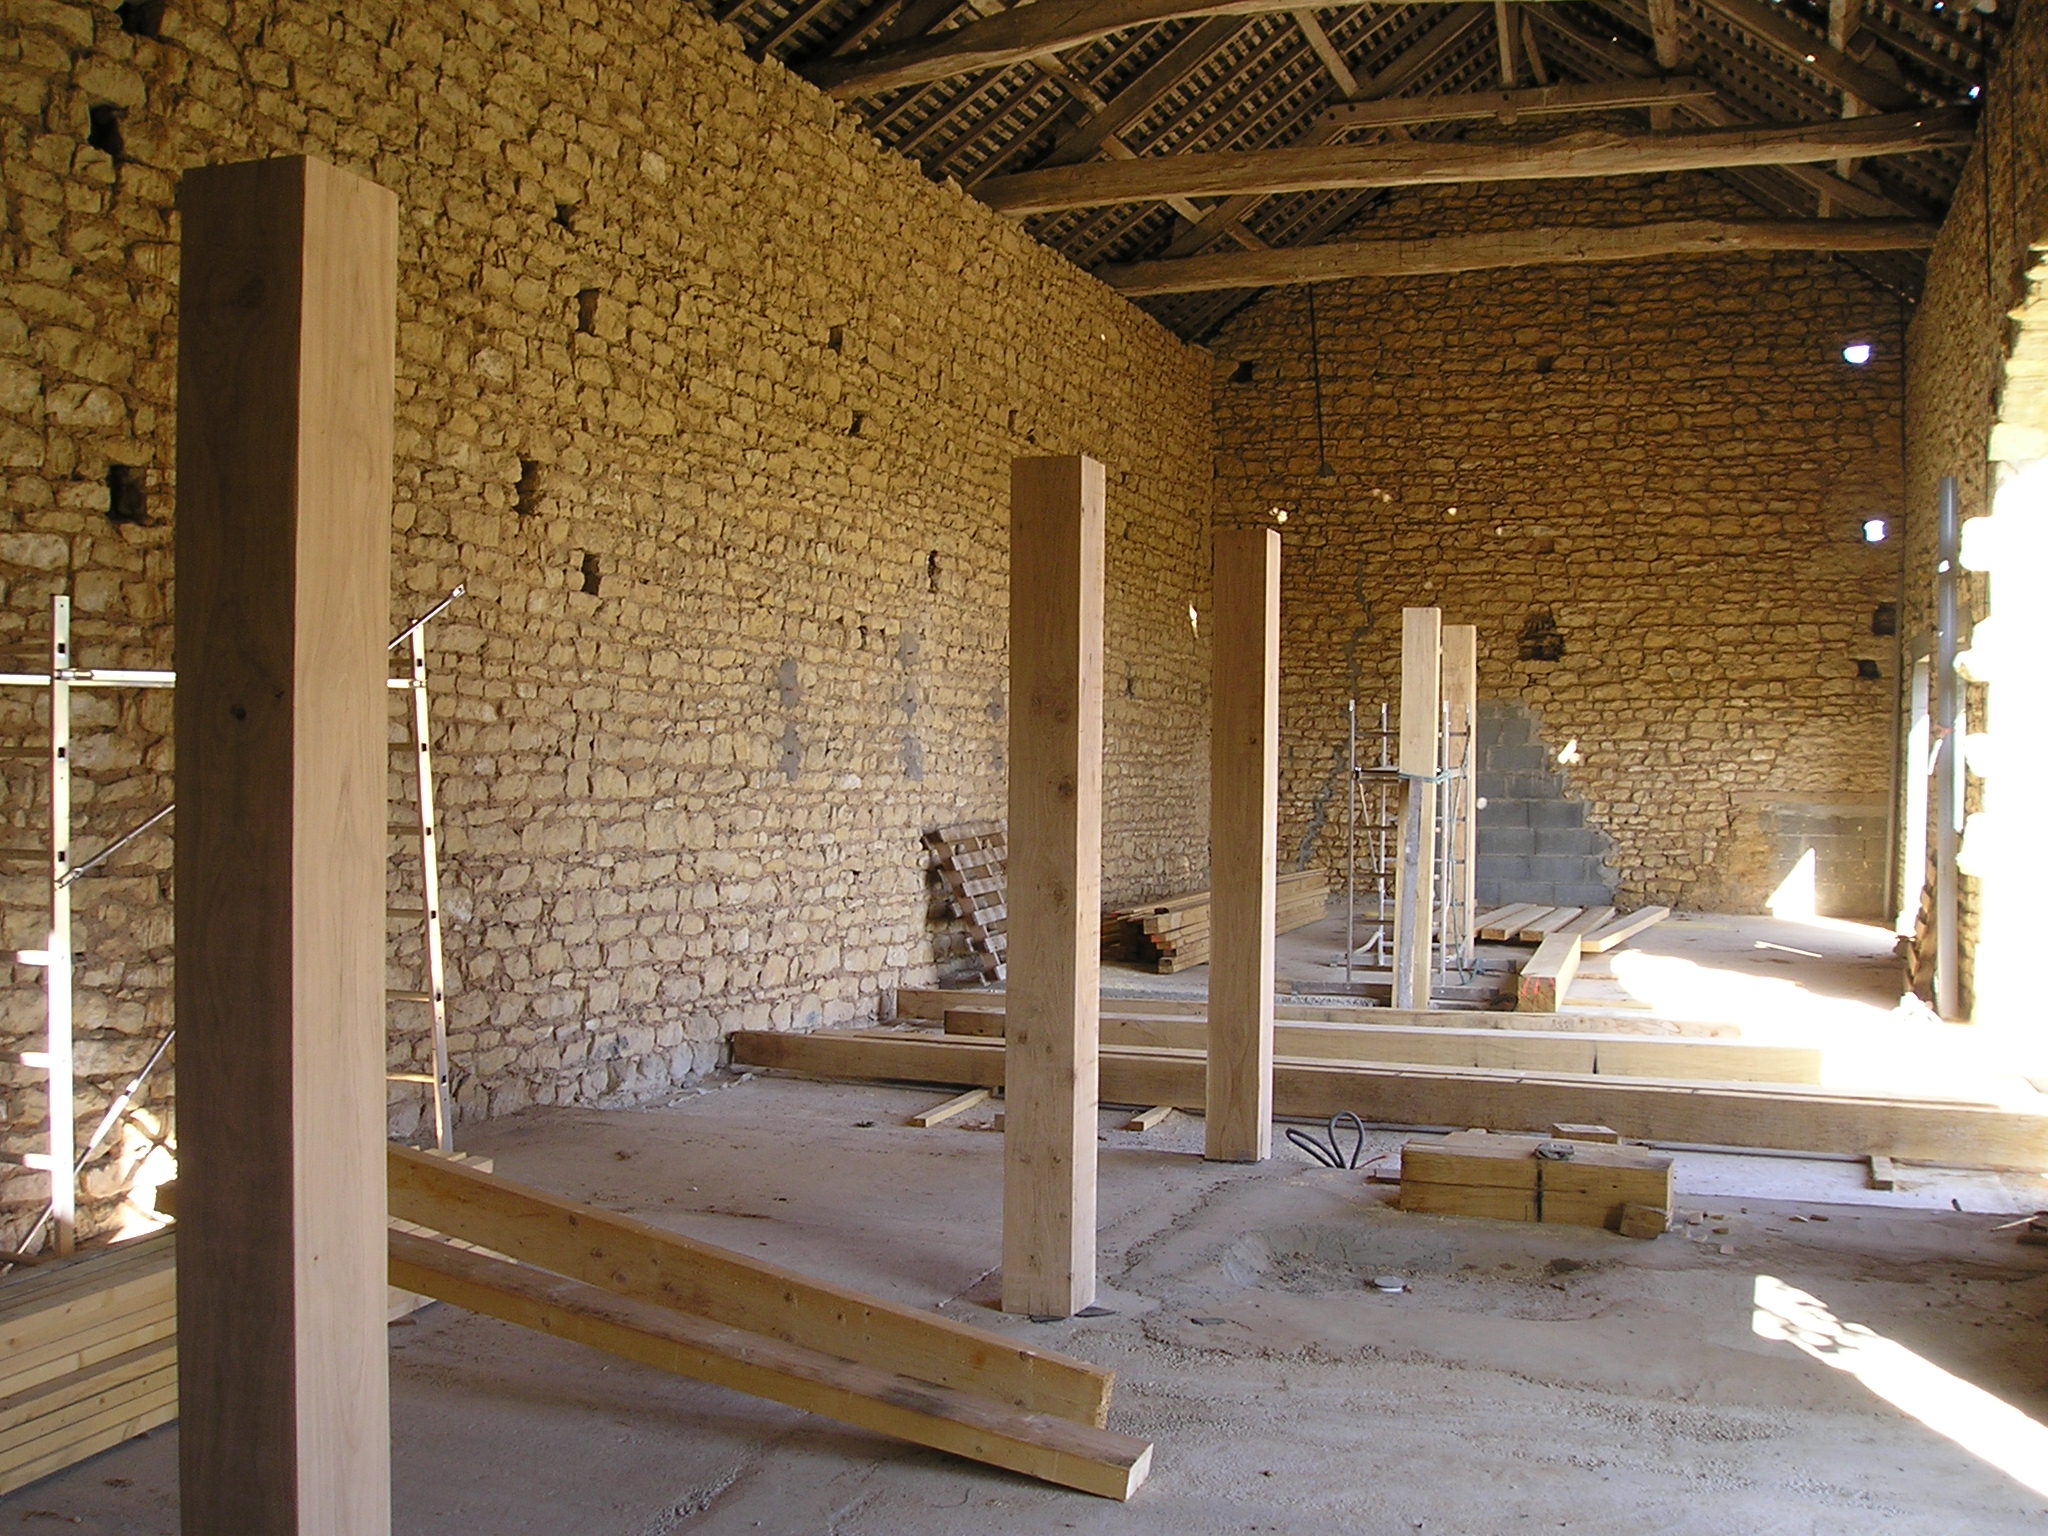
After we had received planning approval we set about laying out for the floor. The existing floor was 65cm higher from corner to corner diagonally. With this in mind a 20cm margin of concrete was cast all round the internal walls to finished floor height and a 25cm line was cast down the centre of the floor to this height. 1 meter cubes of reinforced concrete were laid as footings for the beam supports, to alleviate the “stiletto heel” effect. This gave us a frame of concrete to work within and 40 tonnes of gravel was barrowed in, flattened and levelled. The floor was then made up using a damp proof membrane, 65mm polystyrene and trellis reinforcing, followed by 100 mm of concrete. All done by hand. I had brought Julia (my better half) a concrete mixer for her birthday !! I think I overstressed the importance of keeping it clean as at the end of everyday it was washed and dried. Even today I am convinced we could use it to make cake mixture.
The next stage was to produce the openings in the building for windows and doors. This process involves props, temporary supports, walls dangling overhead and the construction of lintels. Through choice I would never, ever do these myself again. Builders call these part of the “gros-ouevre” and are exactly that. Heavy, back breaking and not to be undertaken lightly. My advice get quotes from professionals and let them do them. They can also take away the many tonnes of rubble generated. It just goes on and on building up the bigger the hole in the wall becomes !!!! On the subject of giving advice. This is the way I did my conversion. I cannot say it is the best way and any advice is given in good faith.
Back to the comfort zone
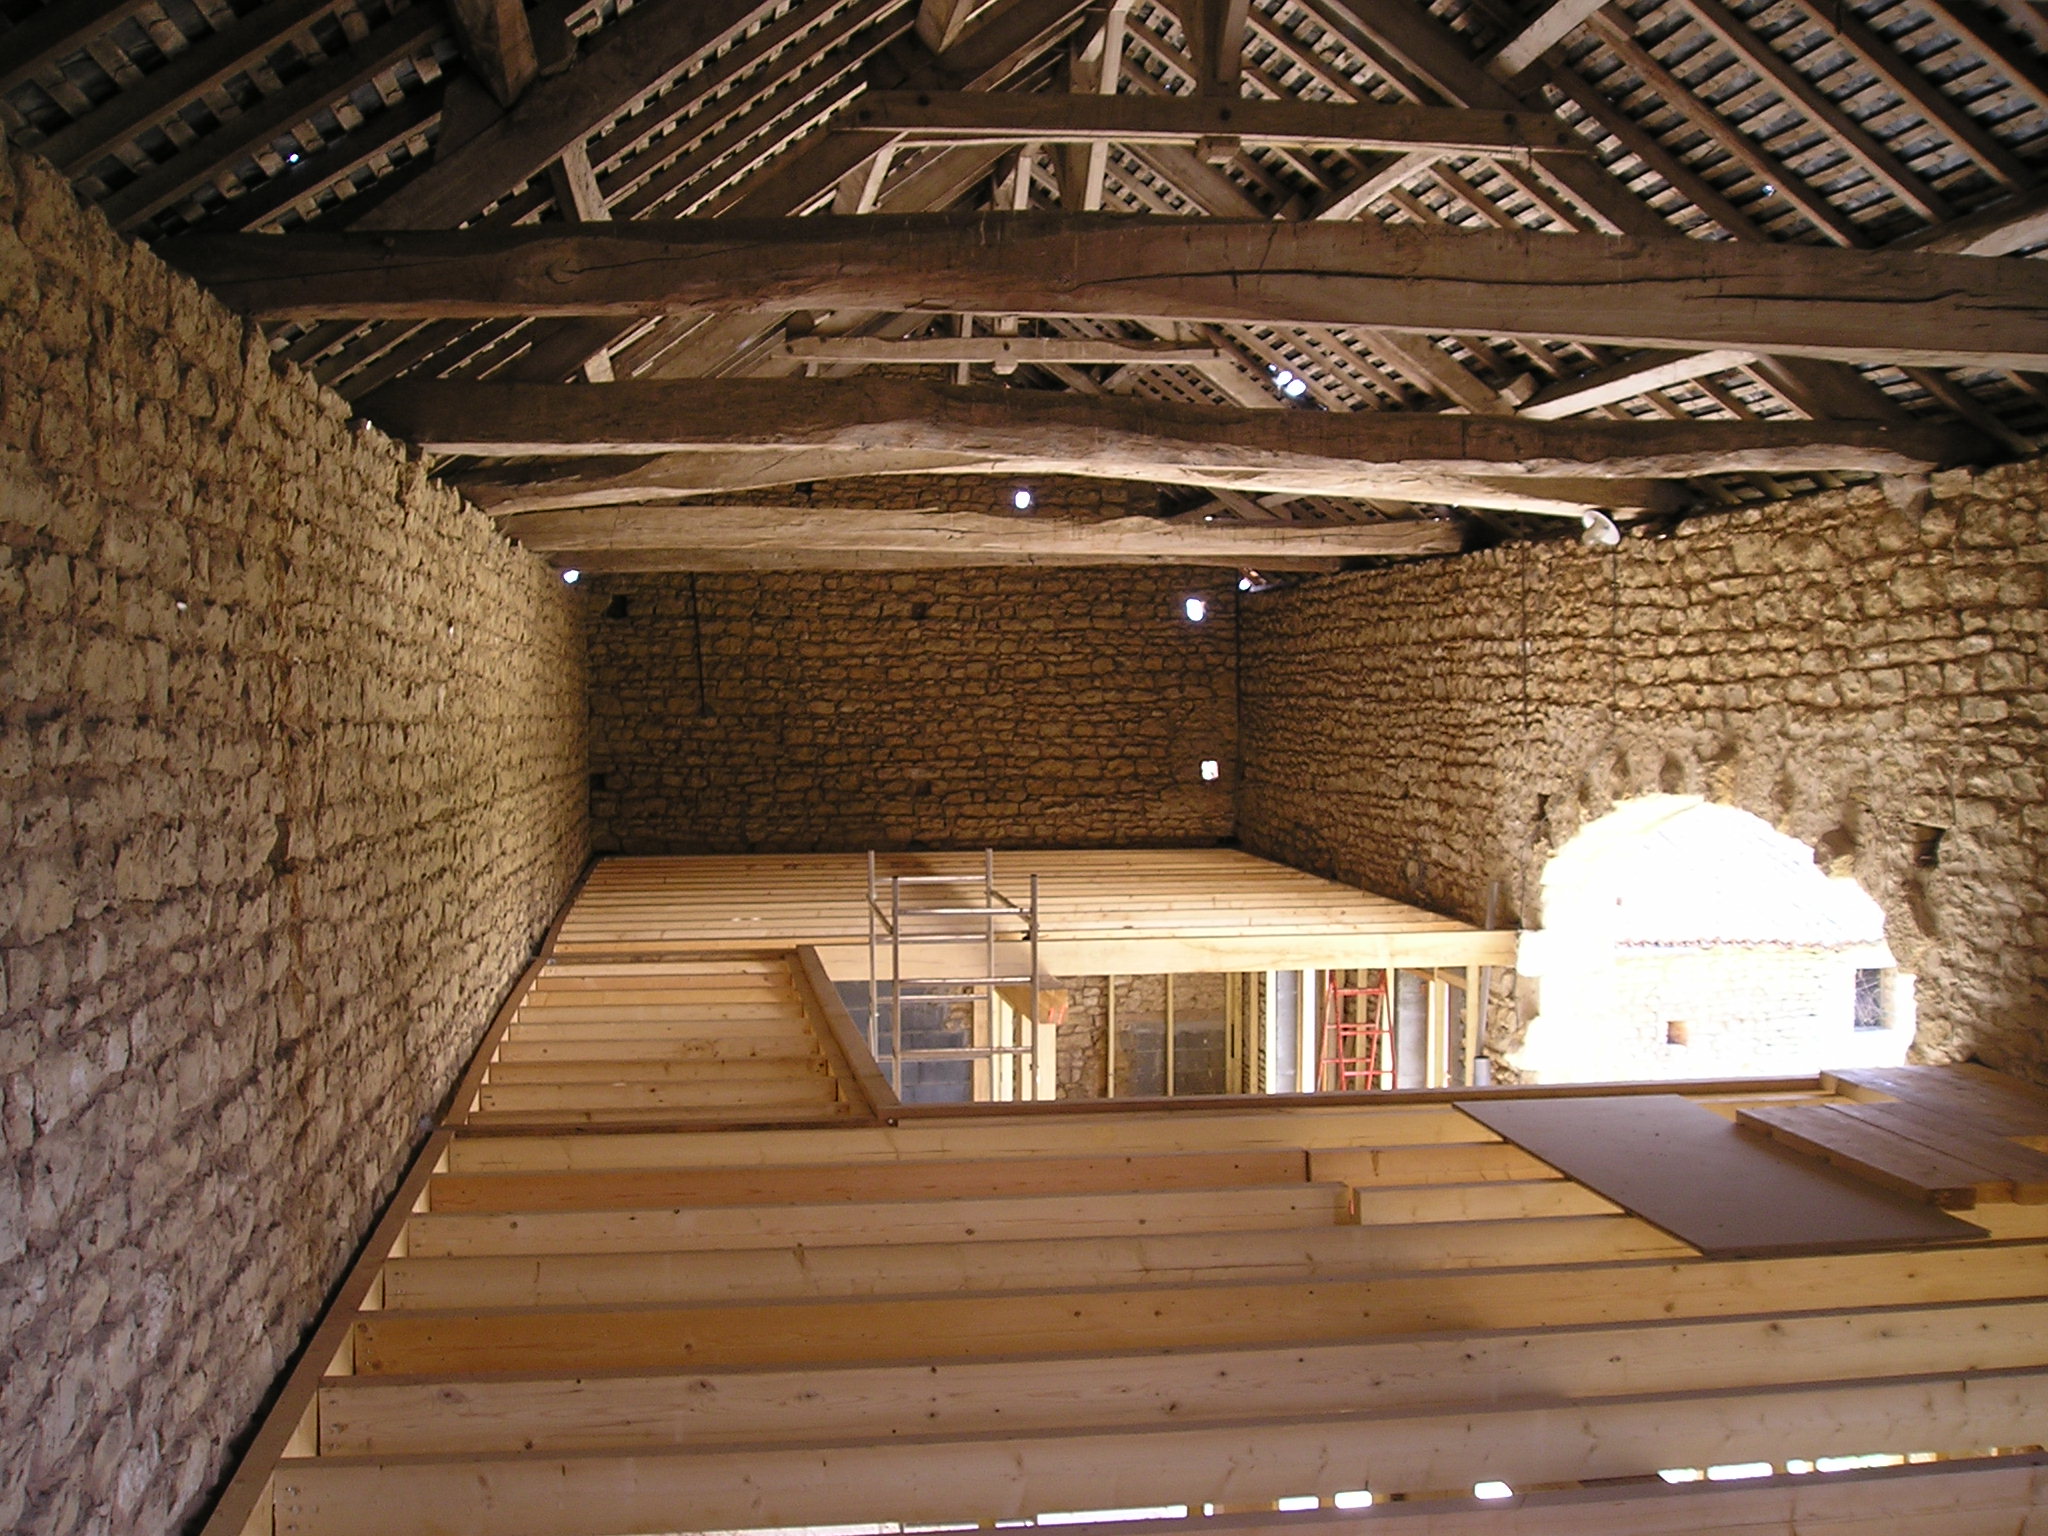
Having spent a few weeks creating the openings in the walls downstairs it was good to be looking forward to the idea of building the upstairs floor for our barn. As the title suggests I am more comfortable with the wood aspect and had more of an idea of what was to be expected and done.
A quick word, before I carry on, about the present economic climate and the “crise economique” overtaking everybody’s thought processes. Before we embarked on this project we knew we had a limited budget and did not want to take out a mortgage to do the work. In effect we self imposed a credit crunch. The way we organised and set about the floor fitting serves as a good example of how we made best use of our resources, both financial and practical. As I had previously designed and built log cabins/chalets I am comfortable producing working drawings to be able to quantify material requirements. This enabled me to accurately know the amounts and types of wood we were going to use to create the floor. So when some floor boards appeared on special offer we were able to buy the right amount, at the best time, and store them to one side. We, in fact, treated and stained them prior to fitting.
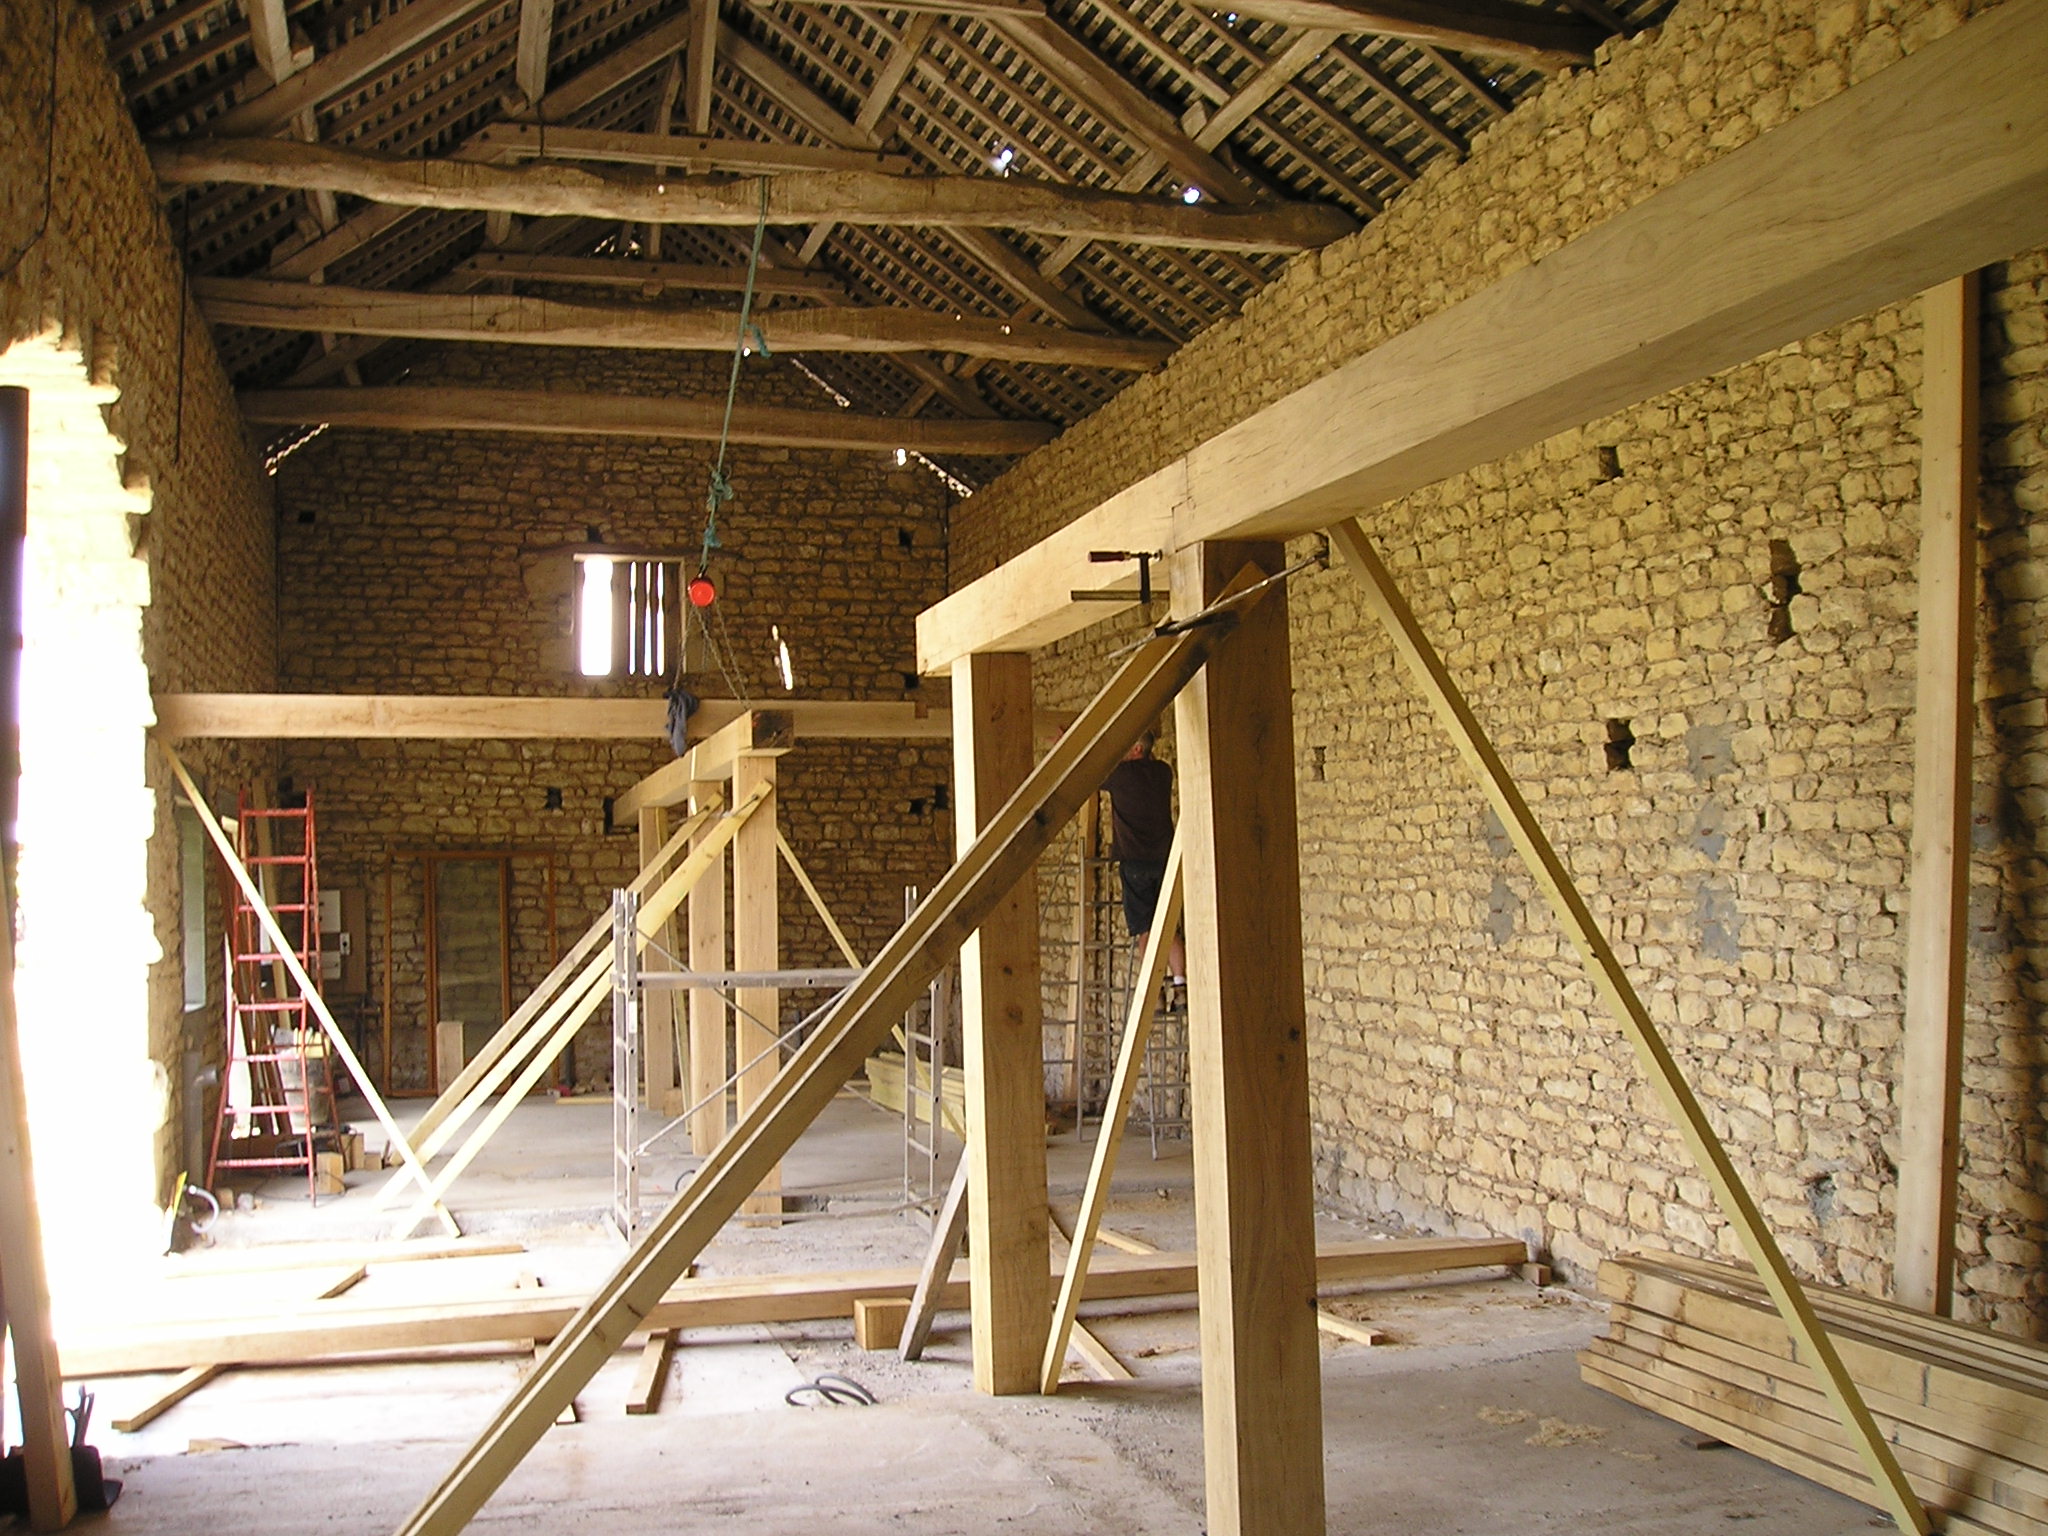
The Oak uprights and beams were bought from a sawmill who also sourced us the Spruce we used for the joists.
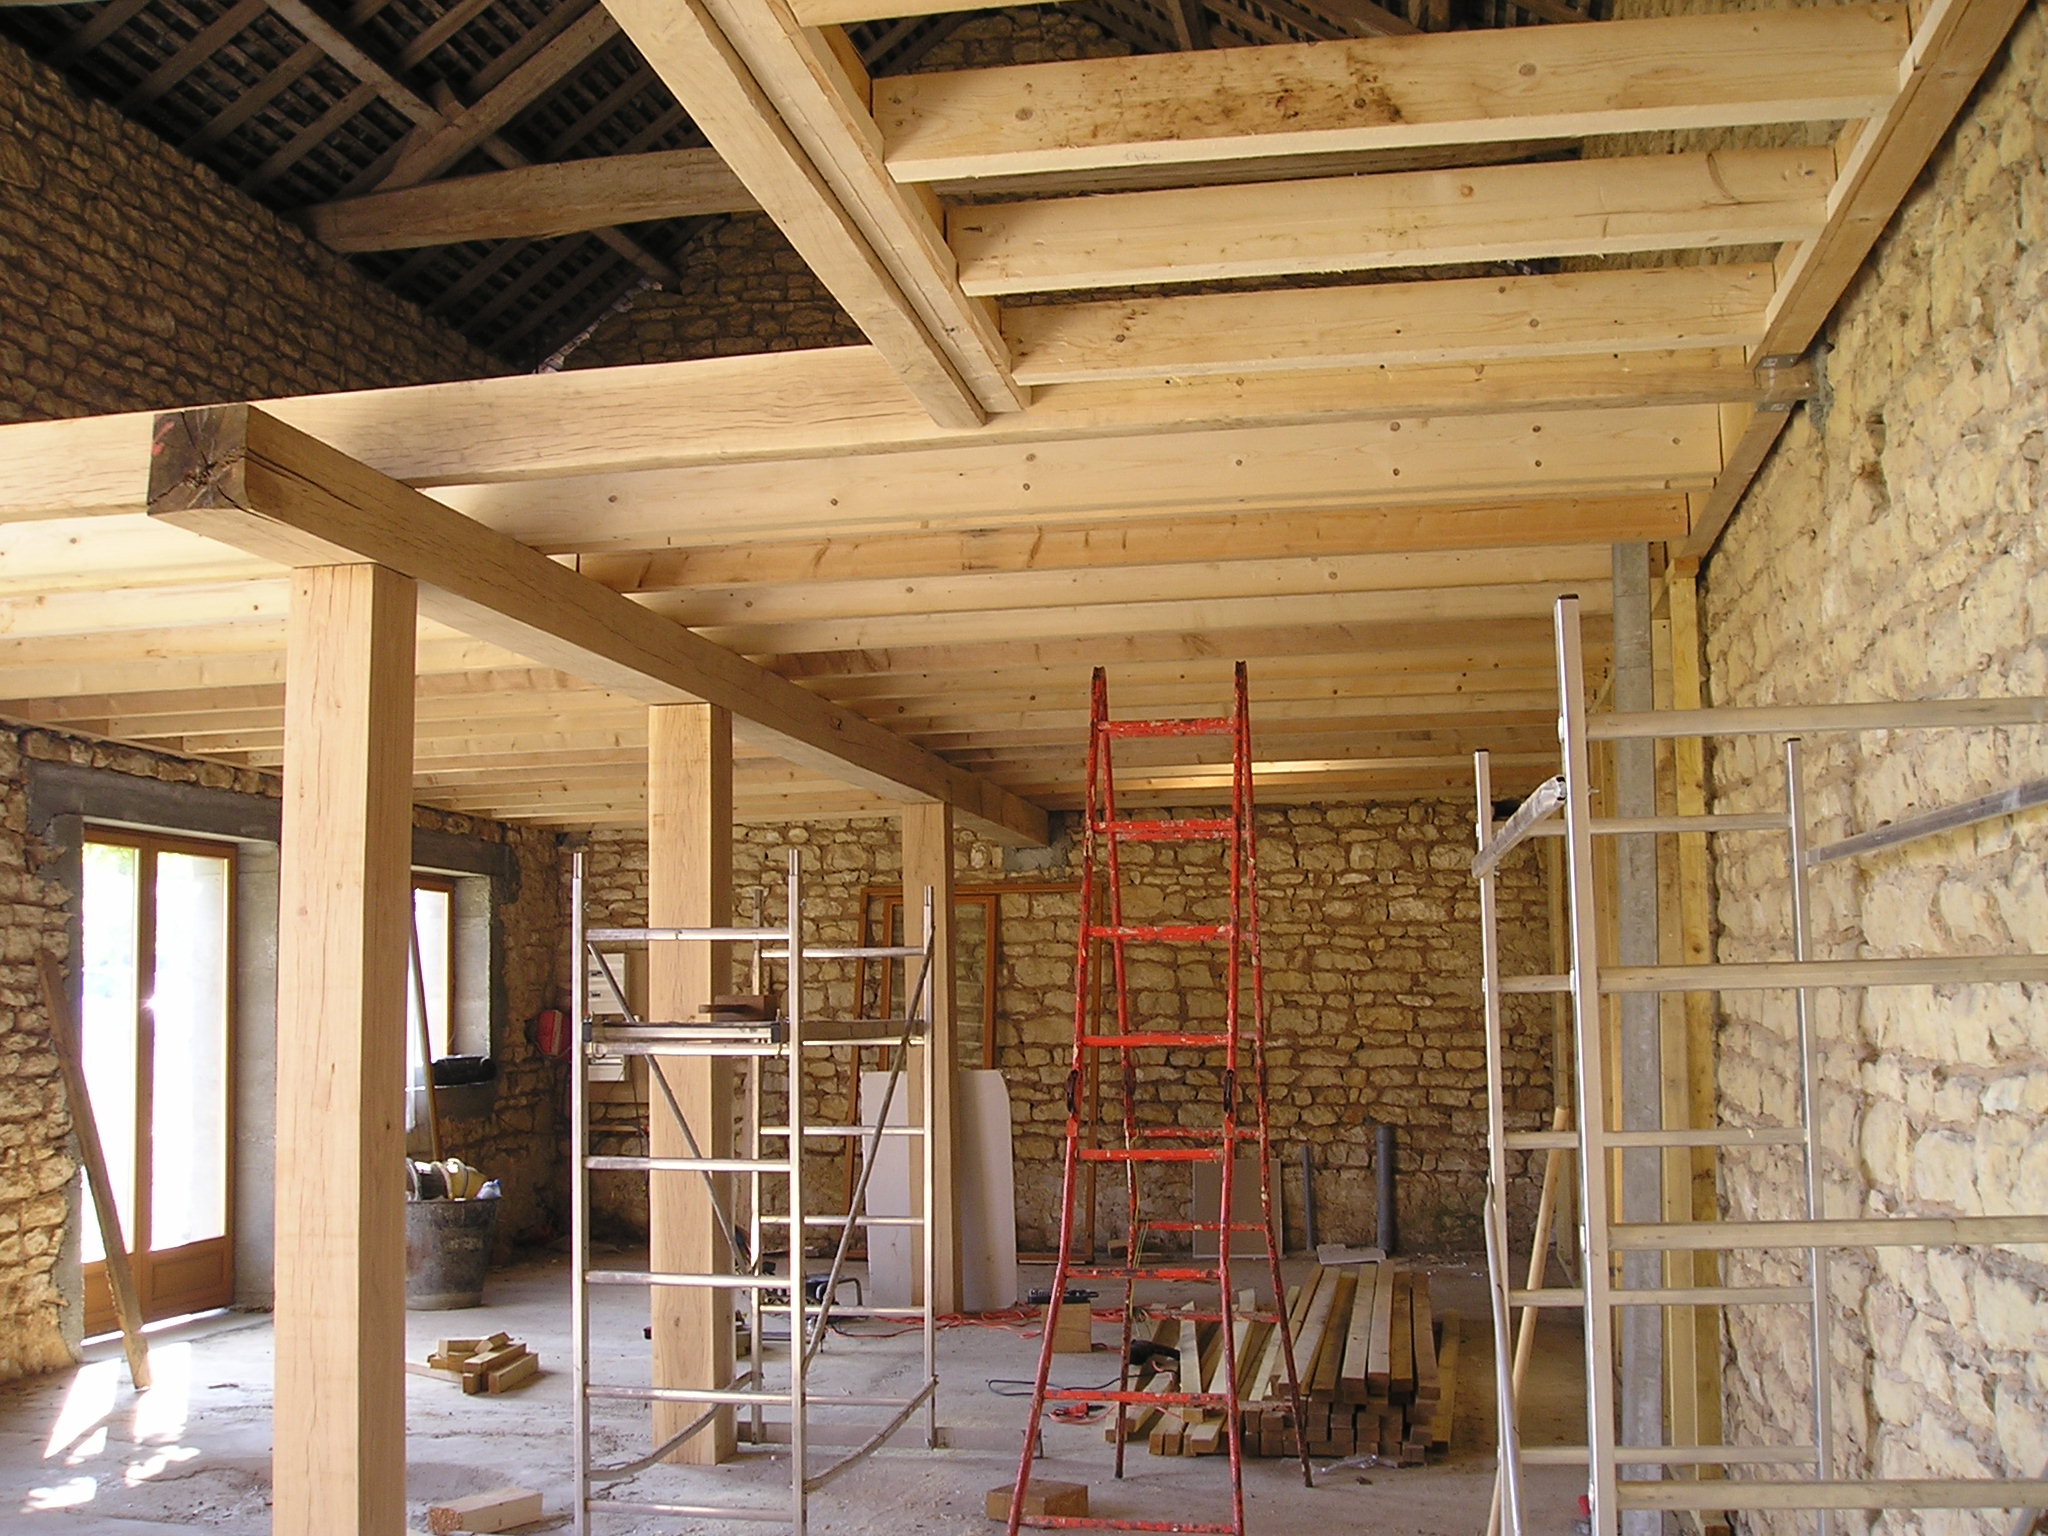
The uprights were raised on spikes located in the concrete cube footings previously mentioned. All the exposed wood has been treated and waxed prior to fitting in position The four beams, longest six meters and shortest three meters, were lowered into position. An Oak crossbeam was then fitted across the back of the hall to create the upstairs link corridor. We tried to hire a 2 tonne hoist but this was going to cost more than buying one. Guess what we did ! Only the Oak beams and the frame ends were socketed into the wall. The floor frame is in fact floating inside the barn walls. I could not face cutting more holes in the walls, especially with the thought of the upstairs openings still to come.
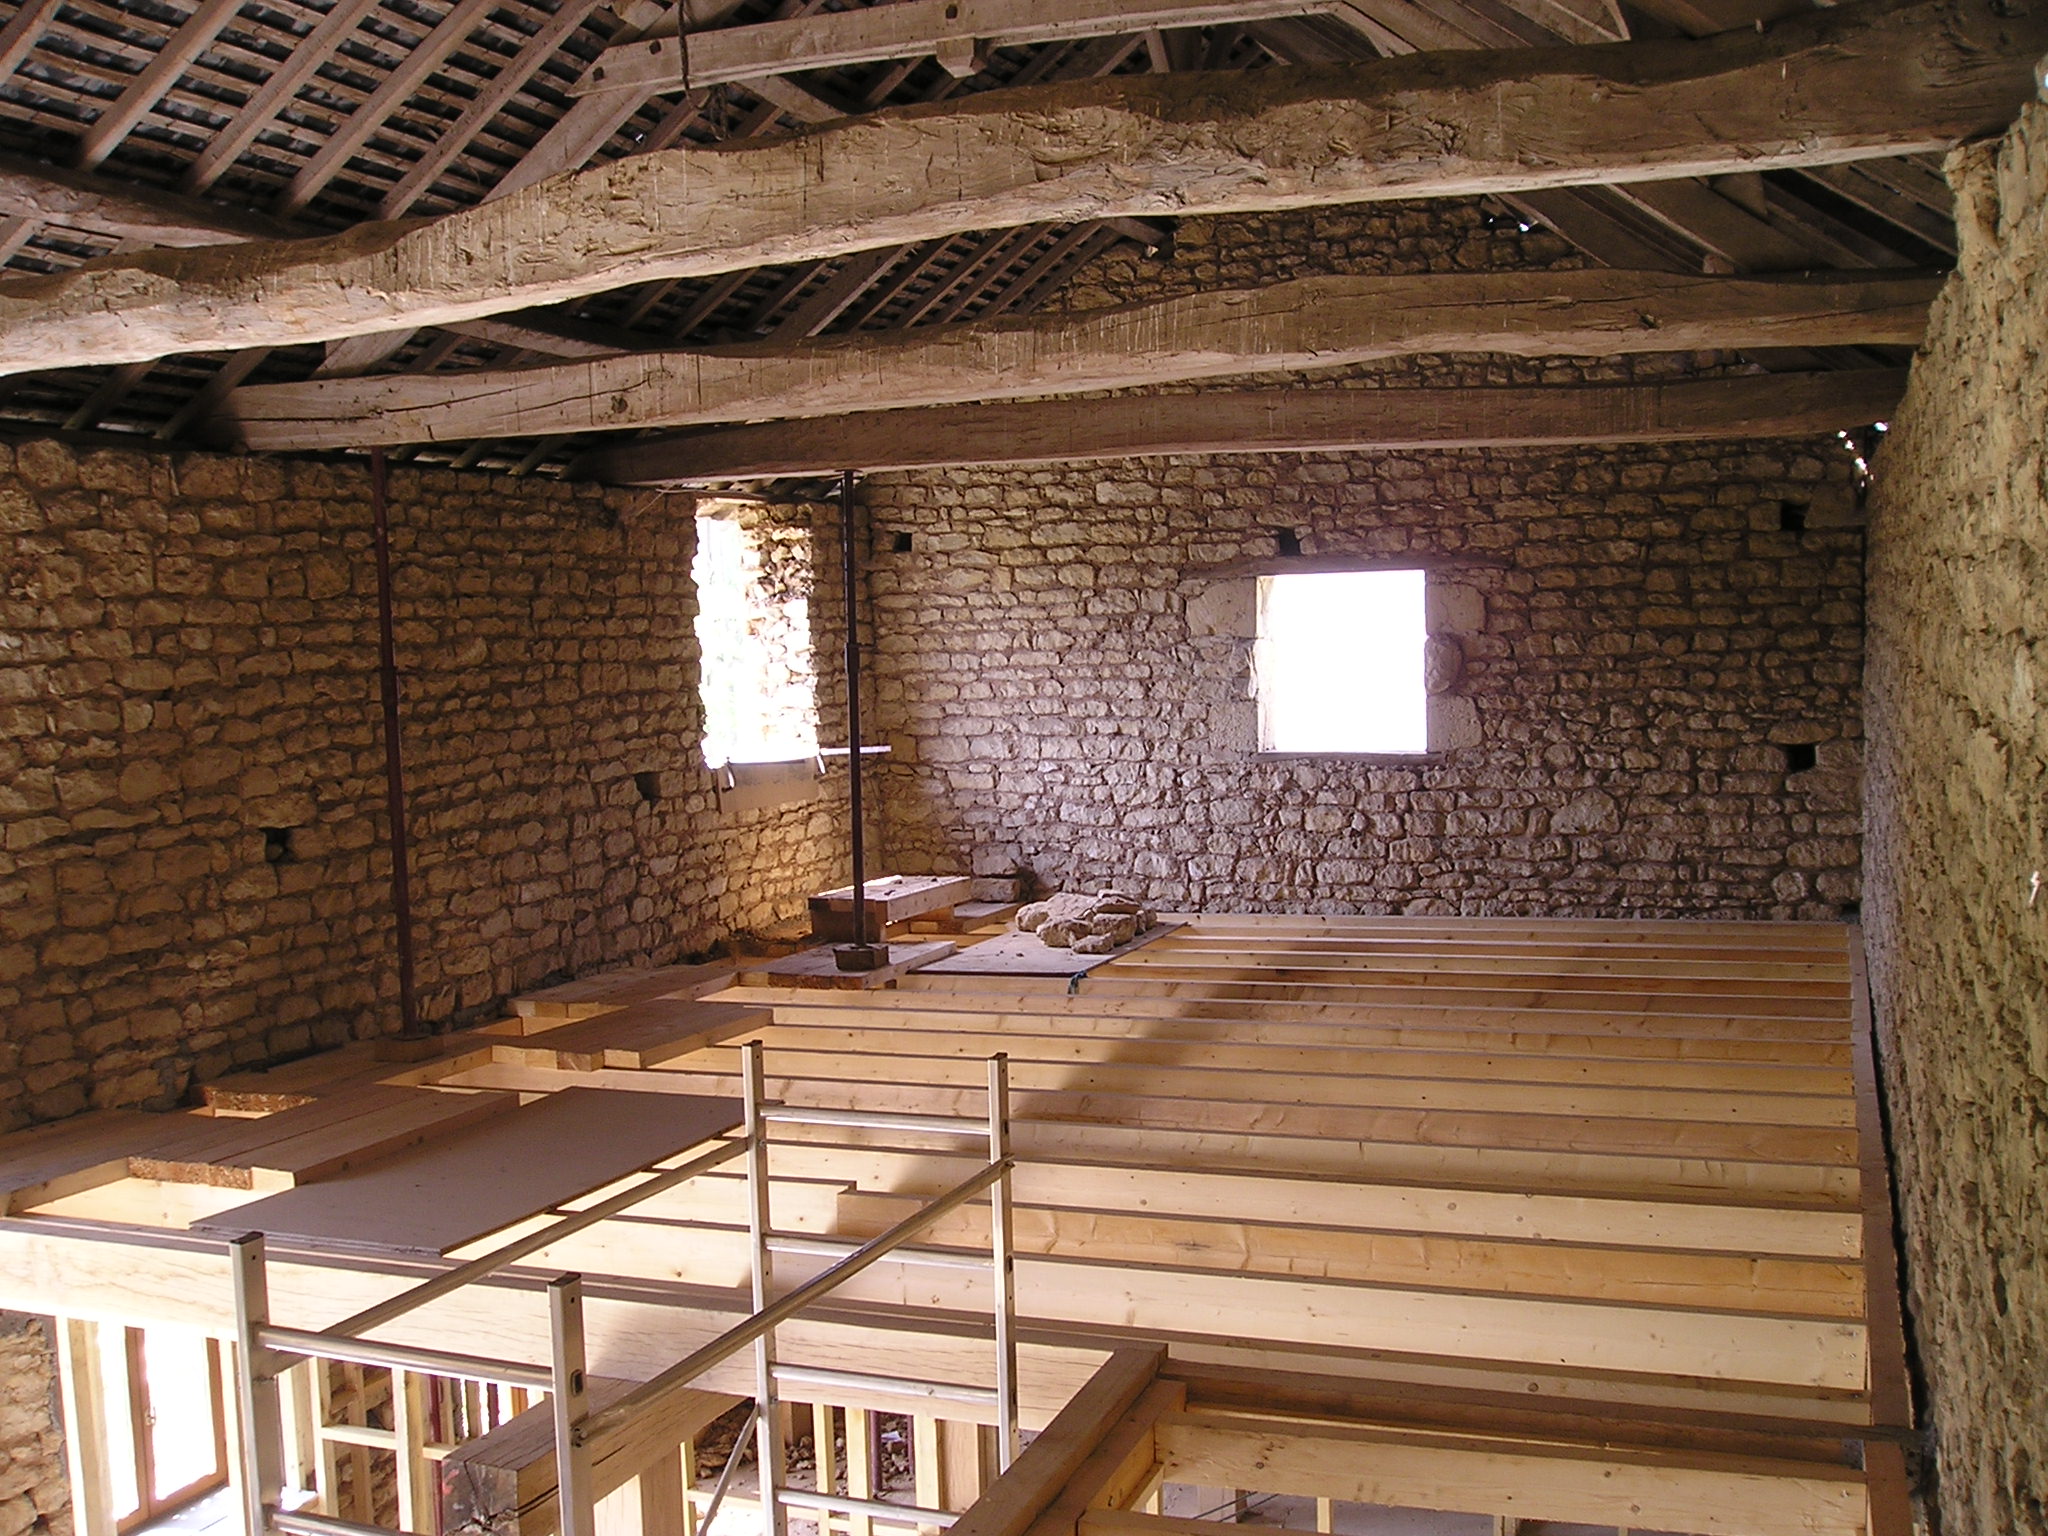
The joists all had to be cut to length individually as our barn is not rectangular. These were spaced so the tongue and groove floor boards were supported at the ends. We also created a mezzanine corridor to separate the two sides upstairs and to create an open plan entrance hallway
In any renovation, conversion project there is a budgetary constraint that has to be taken into account. Figures ranging from €750 to the sky’s the limit, per square meter are all banded about. The range is determined by choice of things like construction methods, fittings and fixtures chosen etc. This can be broken down into the following percentages; 45% materials, 40% labour and 15% incidentals. (Including builders profits materials mark up fees etc). By keeping a sharp look out at material costs and reducing labour to not a lot we kept the third to a minimum. In the case of the floor I would be very surprised if we spent € 2,900(£2,200 at the time). Which in terms of our build made it a bargain. In previous articles I have spoken about the need for careful project management and planning. Actually doing it is a good way of learning on the job, and is so rewarding when you get it right. We feel we are getting it right and will continue to do so.
Lay-outs, Rooms and Open-plan living
Having constructed and laid out the floors we knew roughly where all the bedrooms, bathrooms, lounge and kitchen were going to be. The submitted plans had shown where the windows were positioned and this does tend to dictate that there is going to be a room on the inside for them to illuminate and ventilate.
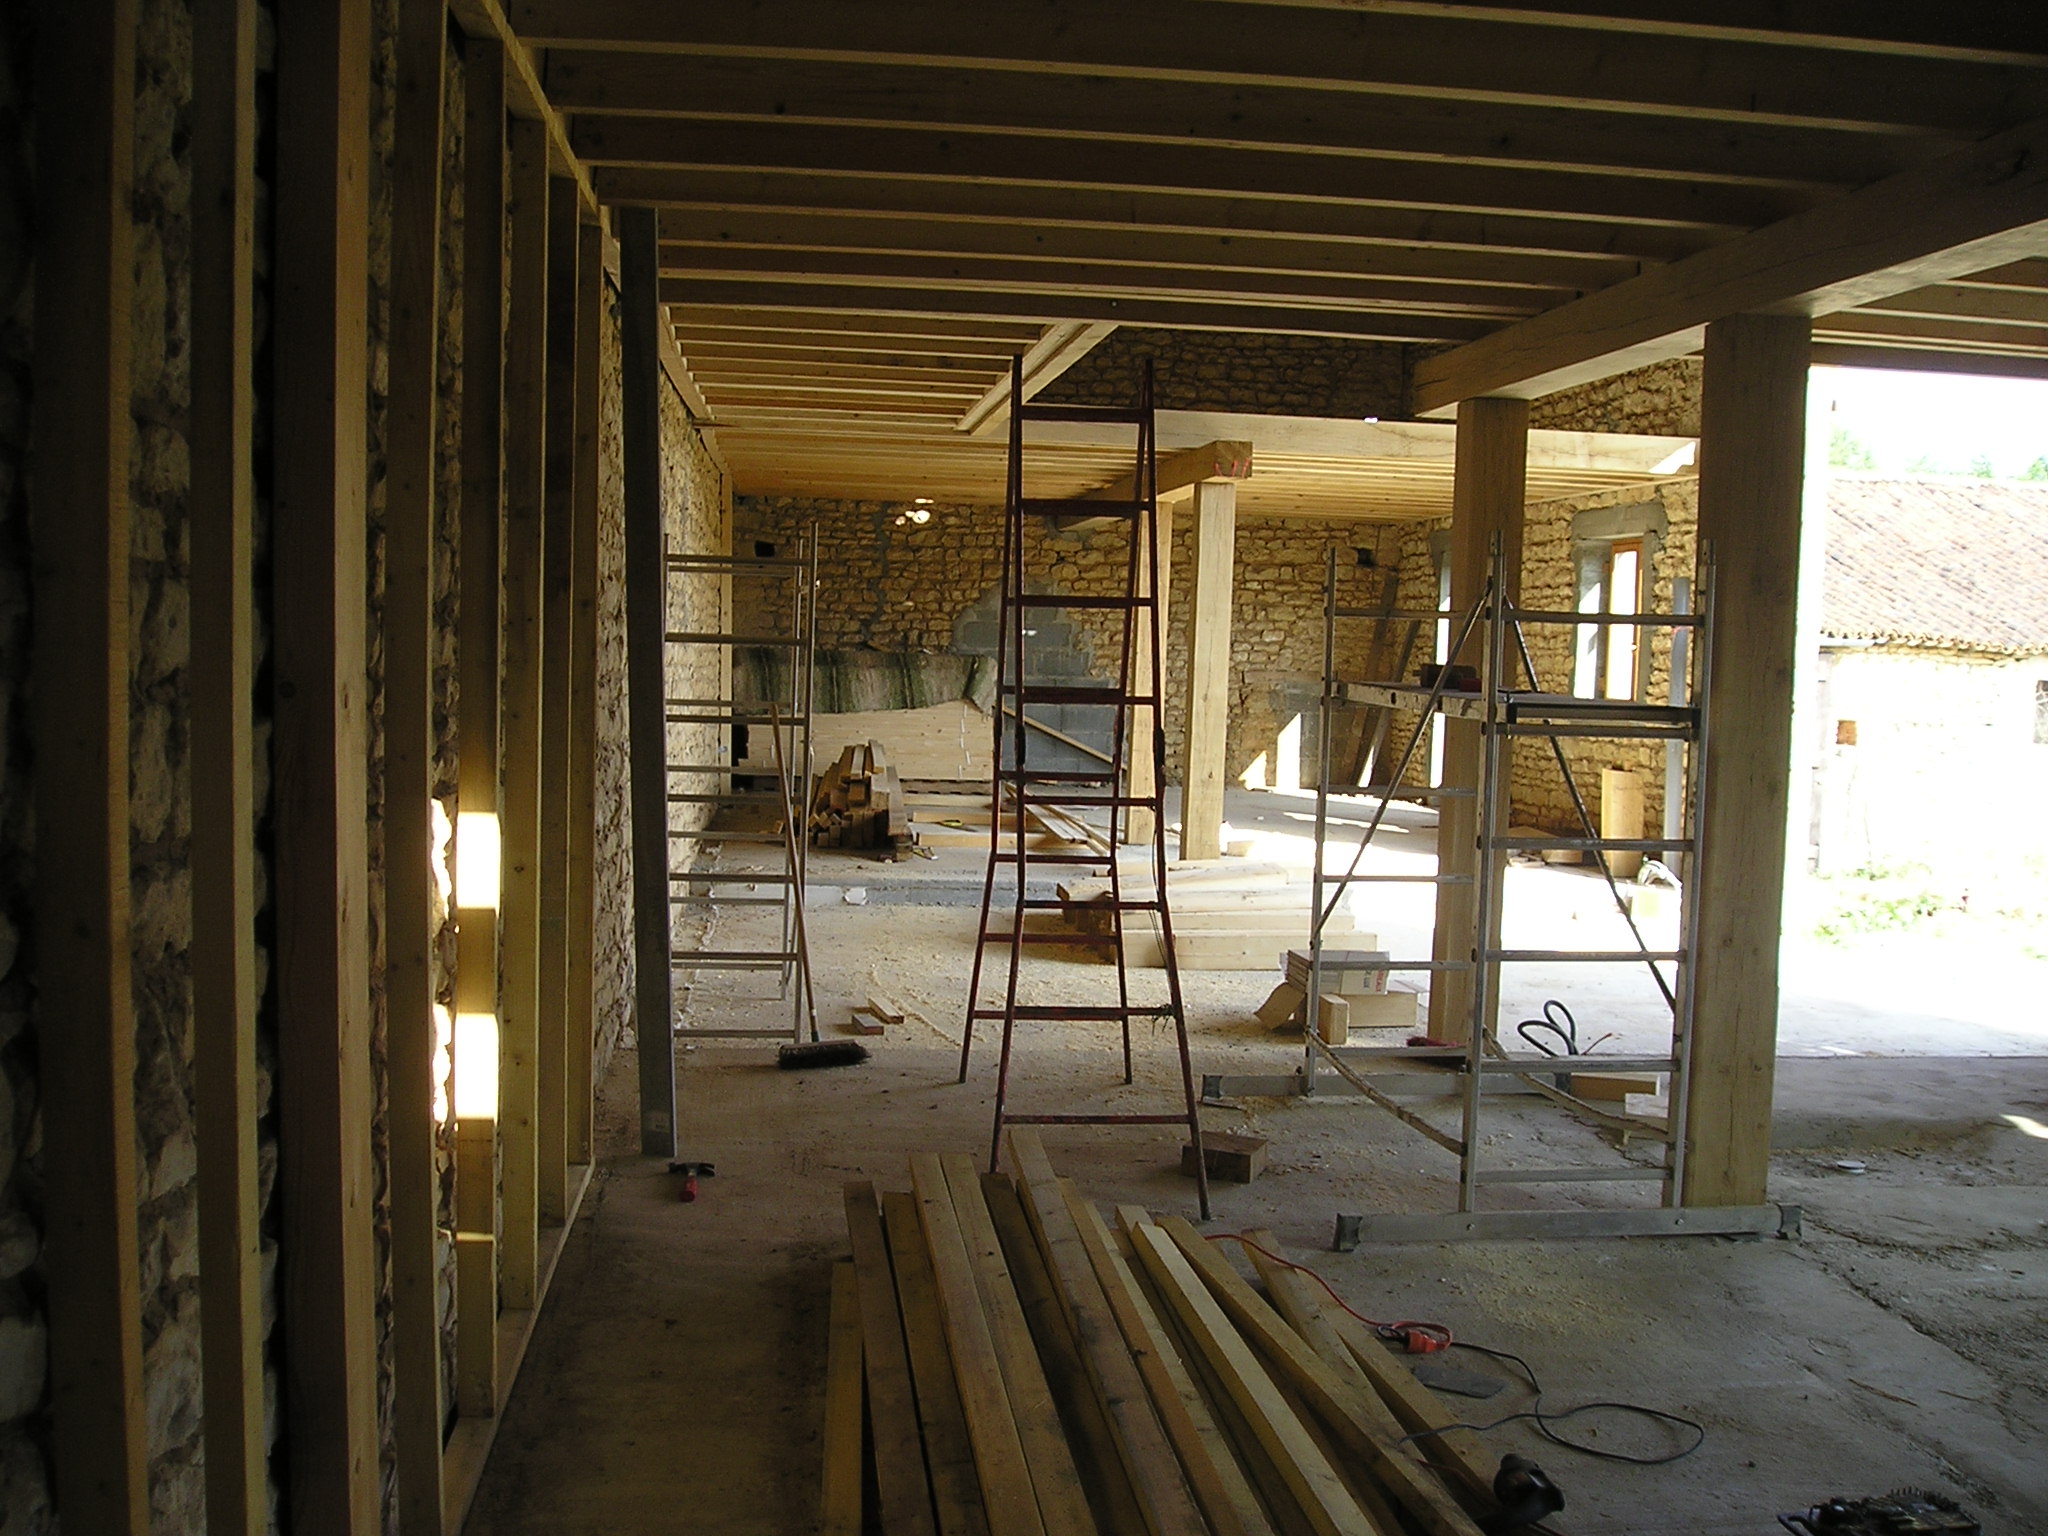
(Before carrying on. Hint. I had laid the joists for the floor boards, before laying these I made all the openings for the upstairs windows working on temporary flooring made from sheets of chipboard. Any marks made by stones that fell on this didn’t matter and the proper flooring was laid after this potentially damaging activity was finished).
I say “roughly” as no matter how much you have planned out interiors on pieces of plain, or even squared, paper it still makes you stop and think when you see a finished expanse of open floor. In our case the downstairs area is 120 square meters (approx 1,080 sq ft). The upper floor, because of the open-plan, double height hall way 100 square meters (approx 900 sq ft).
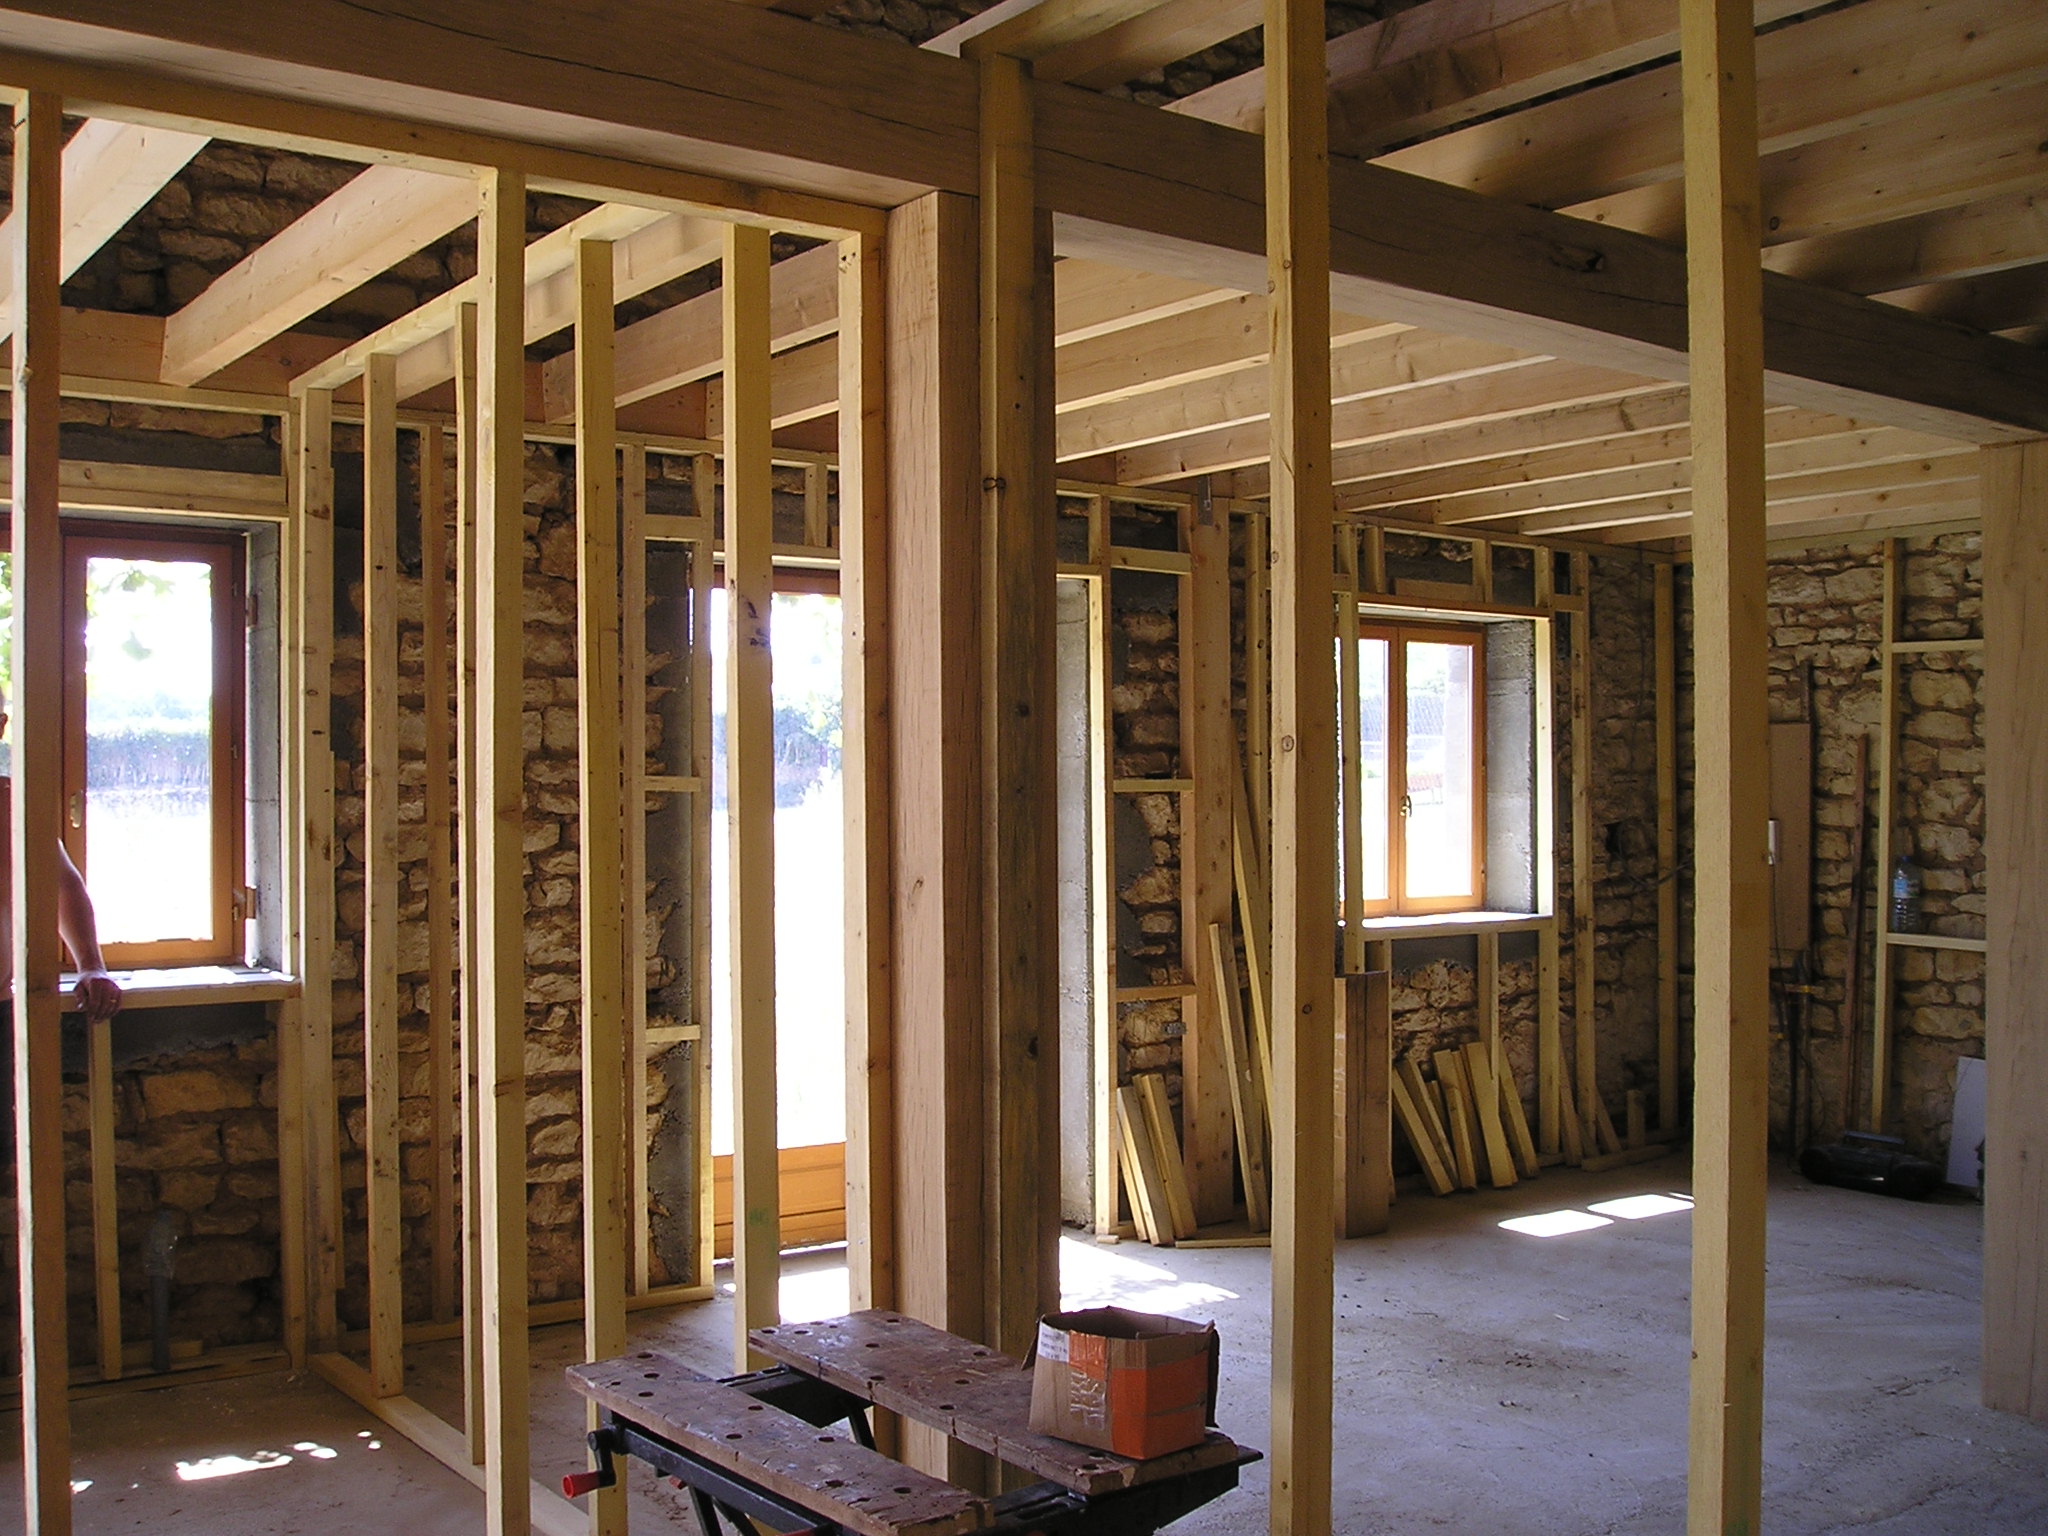
Using lengths of timber laid out on the floor we could “visualise” rooms and actually “walk through” where doorways were going to be. It is almost impossible to say how good this activity can make you feel. It is the first time you can directly relate your planned scheme, with what actually exists “on the ground” so to speak. Minor adjustments were made; Bedroom walls moved, Bathroom extended, by not a lot. Not big things in themselves, but they improved the feel and the flow of the rooms. This criteria of “feel” is most important at this stage and is good for future developments.
I made up the wall framing for the walls that ran parallel to the sides of the building. Calculations were then made as to the number of sheets of plasterboard required for each room. They could then be “posted” into the rooms, ready for when the walls were going to be fitted. Because there were no cross walls in the way, moving 2,5metre by 1,2metre sheets of plasterboard into each space was made a lot easier (nb They are not 8ft X 4ft. The metric dimensions give you a 3 square meter panel). The wall frames across the barn were then constructed and door frames fitted, the walls being built around them and not vice versa, so I knew the doors were going to fit.
With the walls in their skeletal state services runs for electric sockets, lights, switches, electric radiators as well as pipe runs for water could be planned and positioned. When this time consuming, fiddly part was completed all walls, ceilings were insulated with glass-fibre (laine de verre) and plaster boarded.
The large barn door entrance lent itself to the idea of a double height space as the hallway to our house. Once we had decided this we made sure that the floor corridor structure was set at a suitable distance from the back wall to give a decent width of passageway, with enough of a balcony to create the open plan effect. This was complimented by leaving the back and front internal stone walls exposed. They were pointed in lime render and wire-brushed to maximise the lightness of the stone and gave us two feature walls in the finished hallway. The ceiling in this hallway was constructed from a temporary floor we erected in the hall so we had a platform to work from which, when we removed to reveal the finished result it was a real “wow” moment. Very satisfying.
Reprise, Review and Revisit
When writing the six previous articles it was very easy to bowl along assuming that the steps I took would be understood by everybody. Feedback would suggest otherwise! As a result, therefore, below is a series of notes made as a result of: a) re-reading the articles and thinking ‘maybe this might prove useful’, and, b) responses to enquiries received.
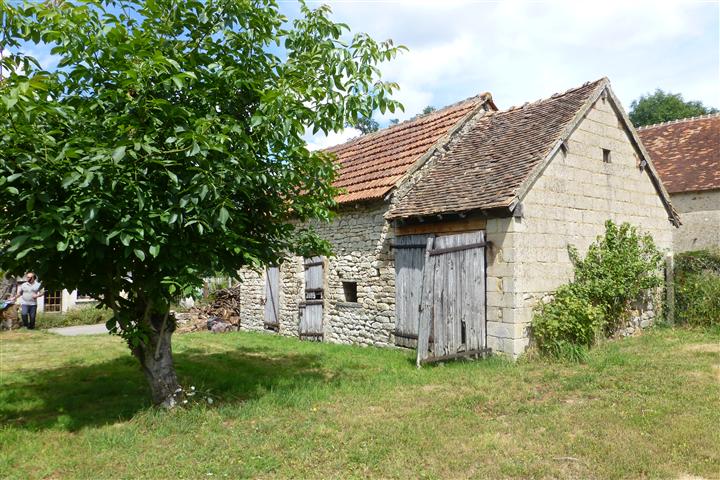
Why a Barn?
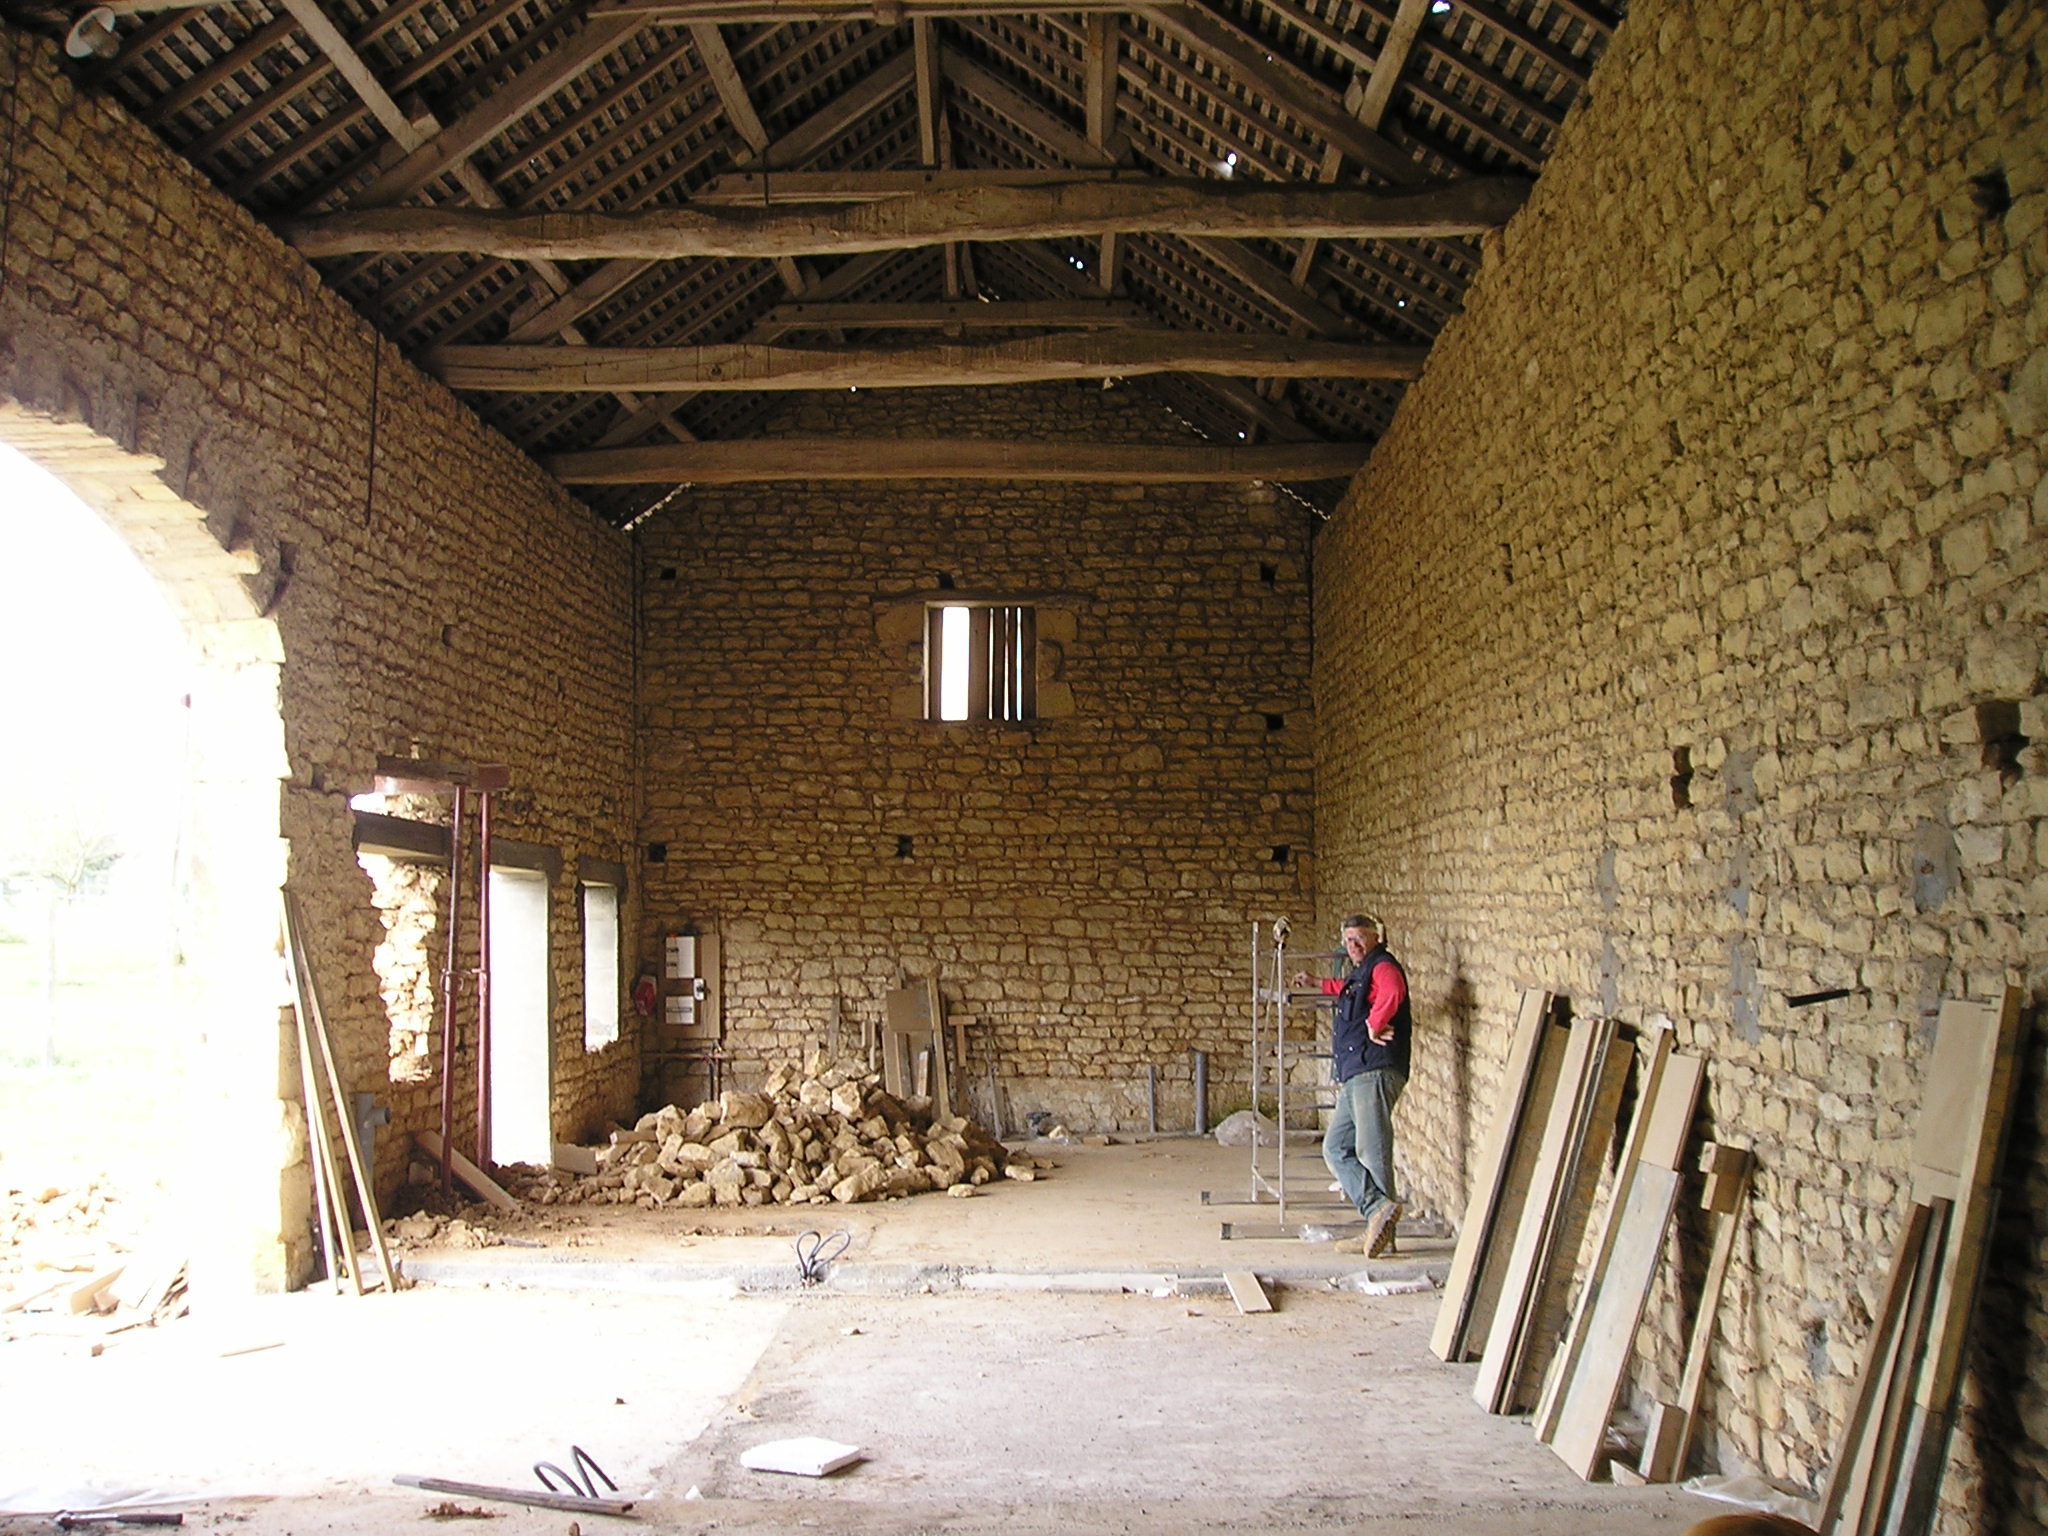
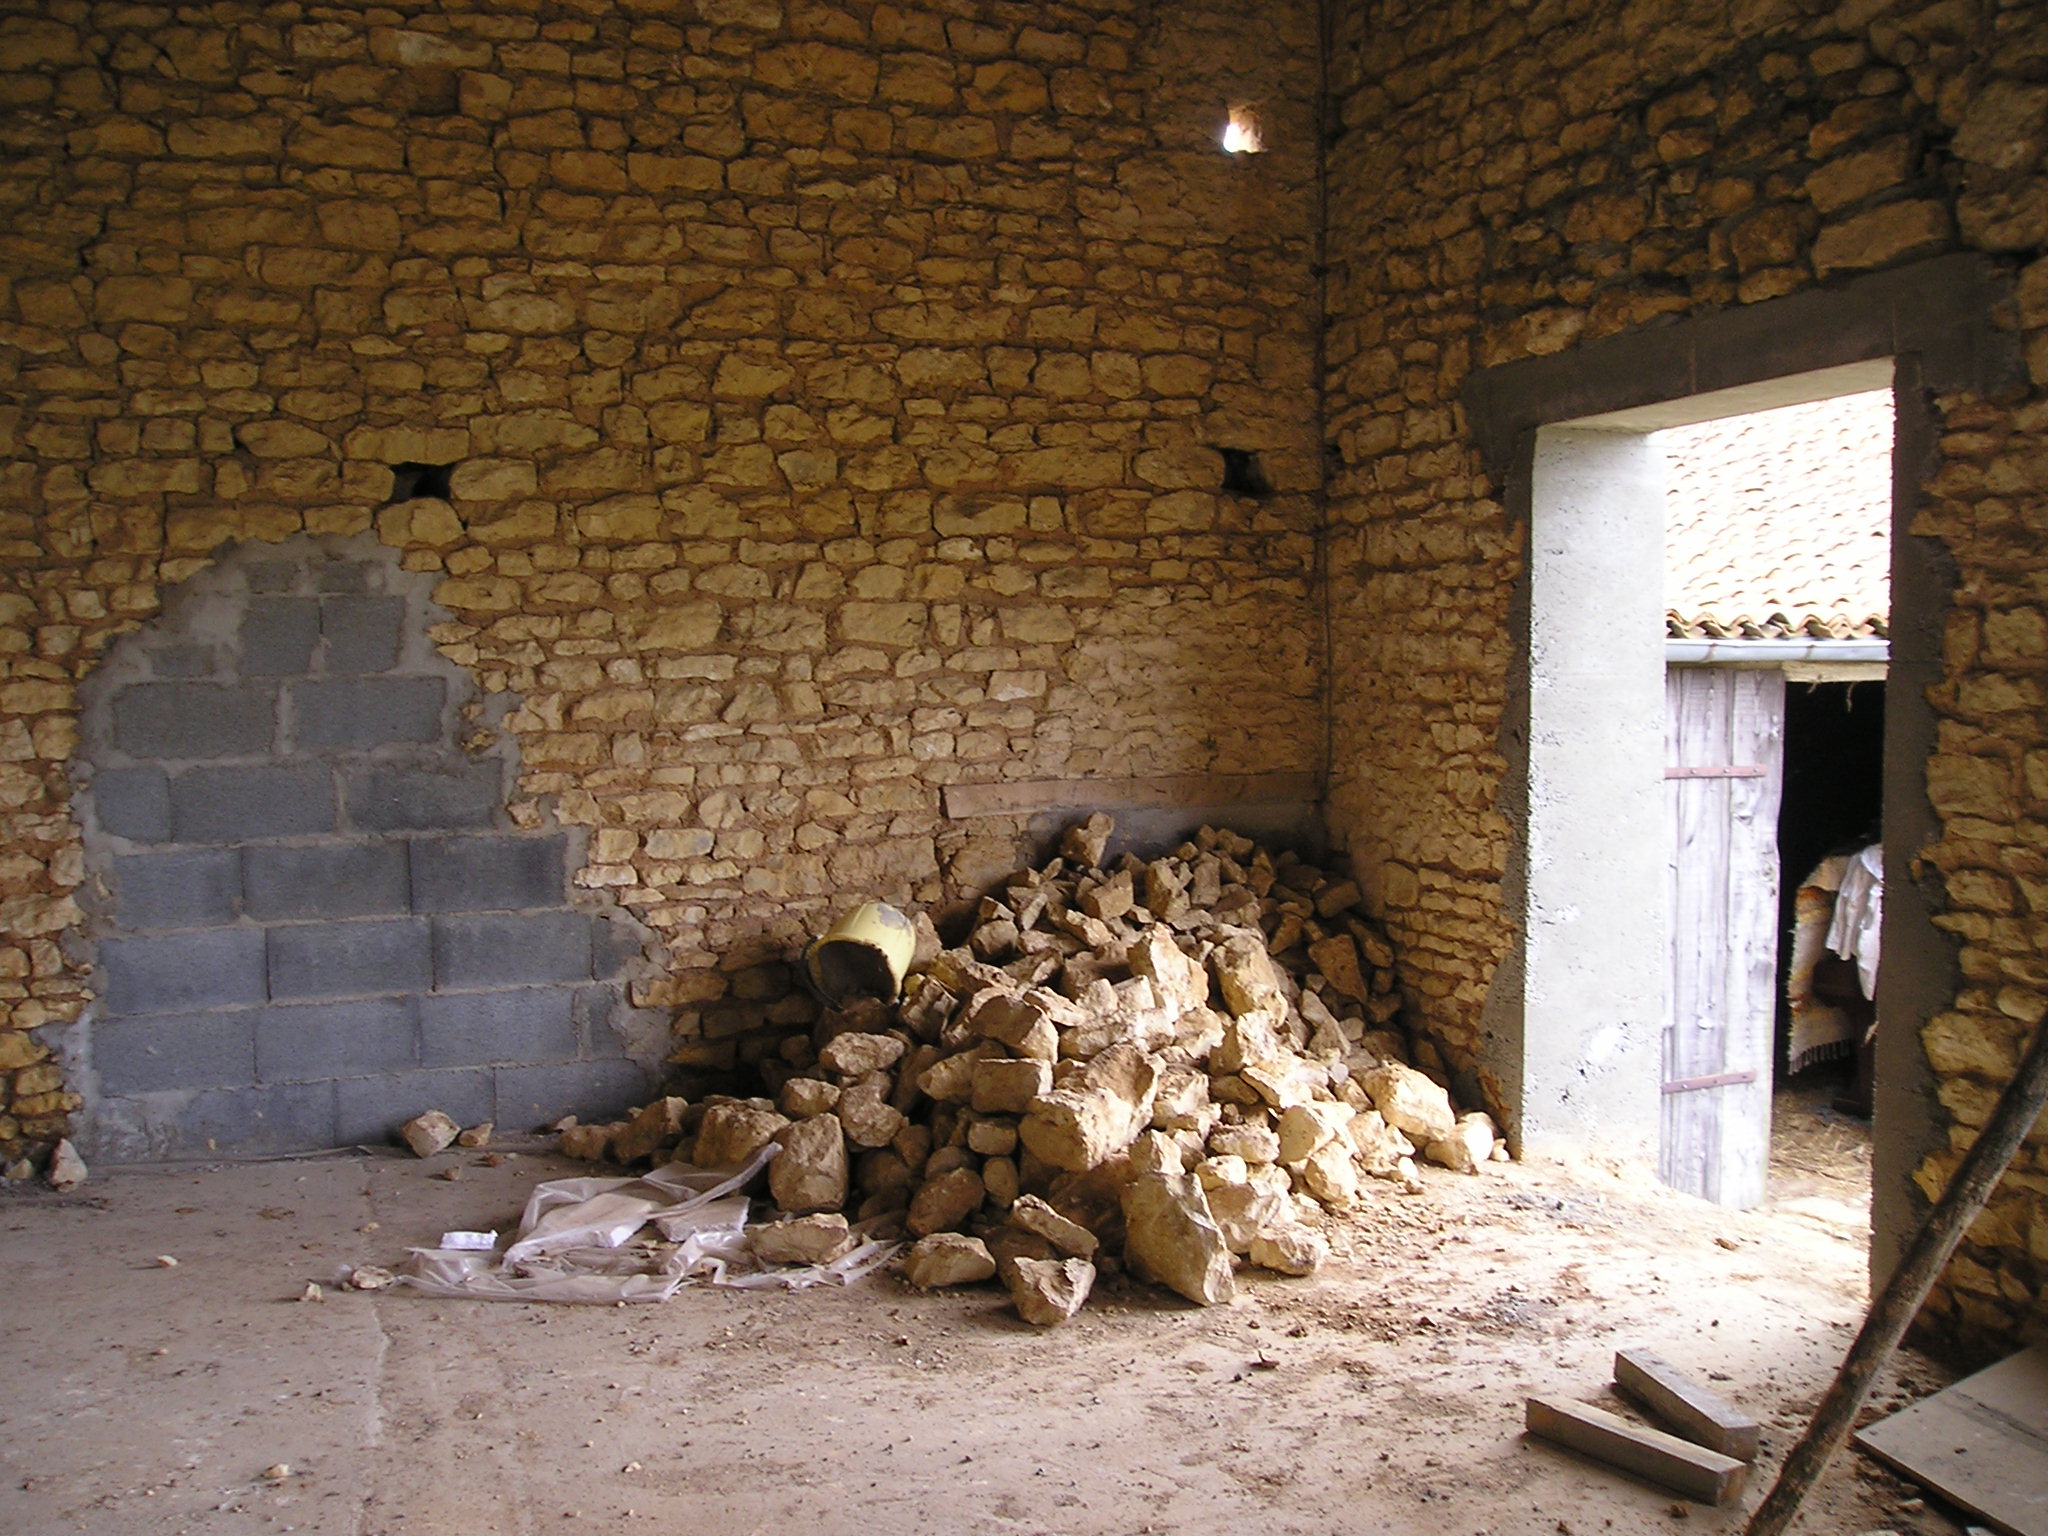
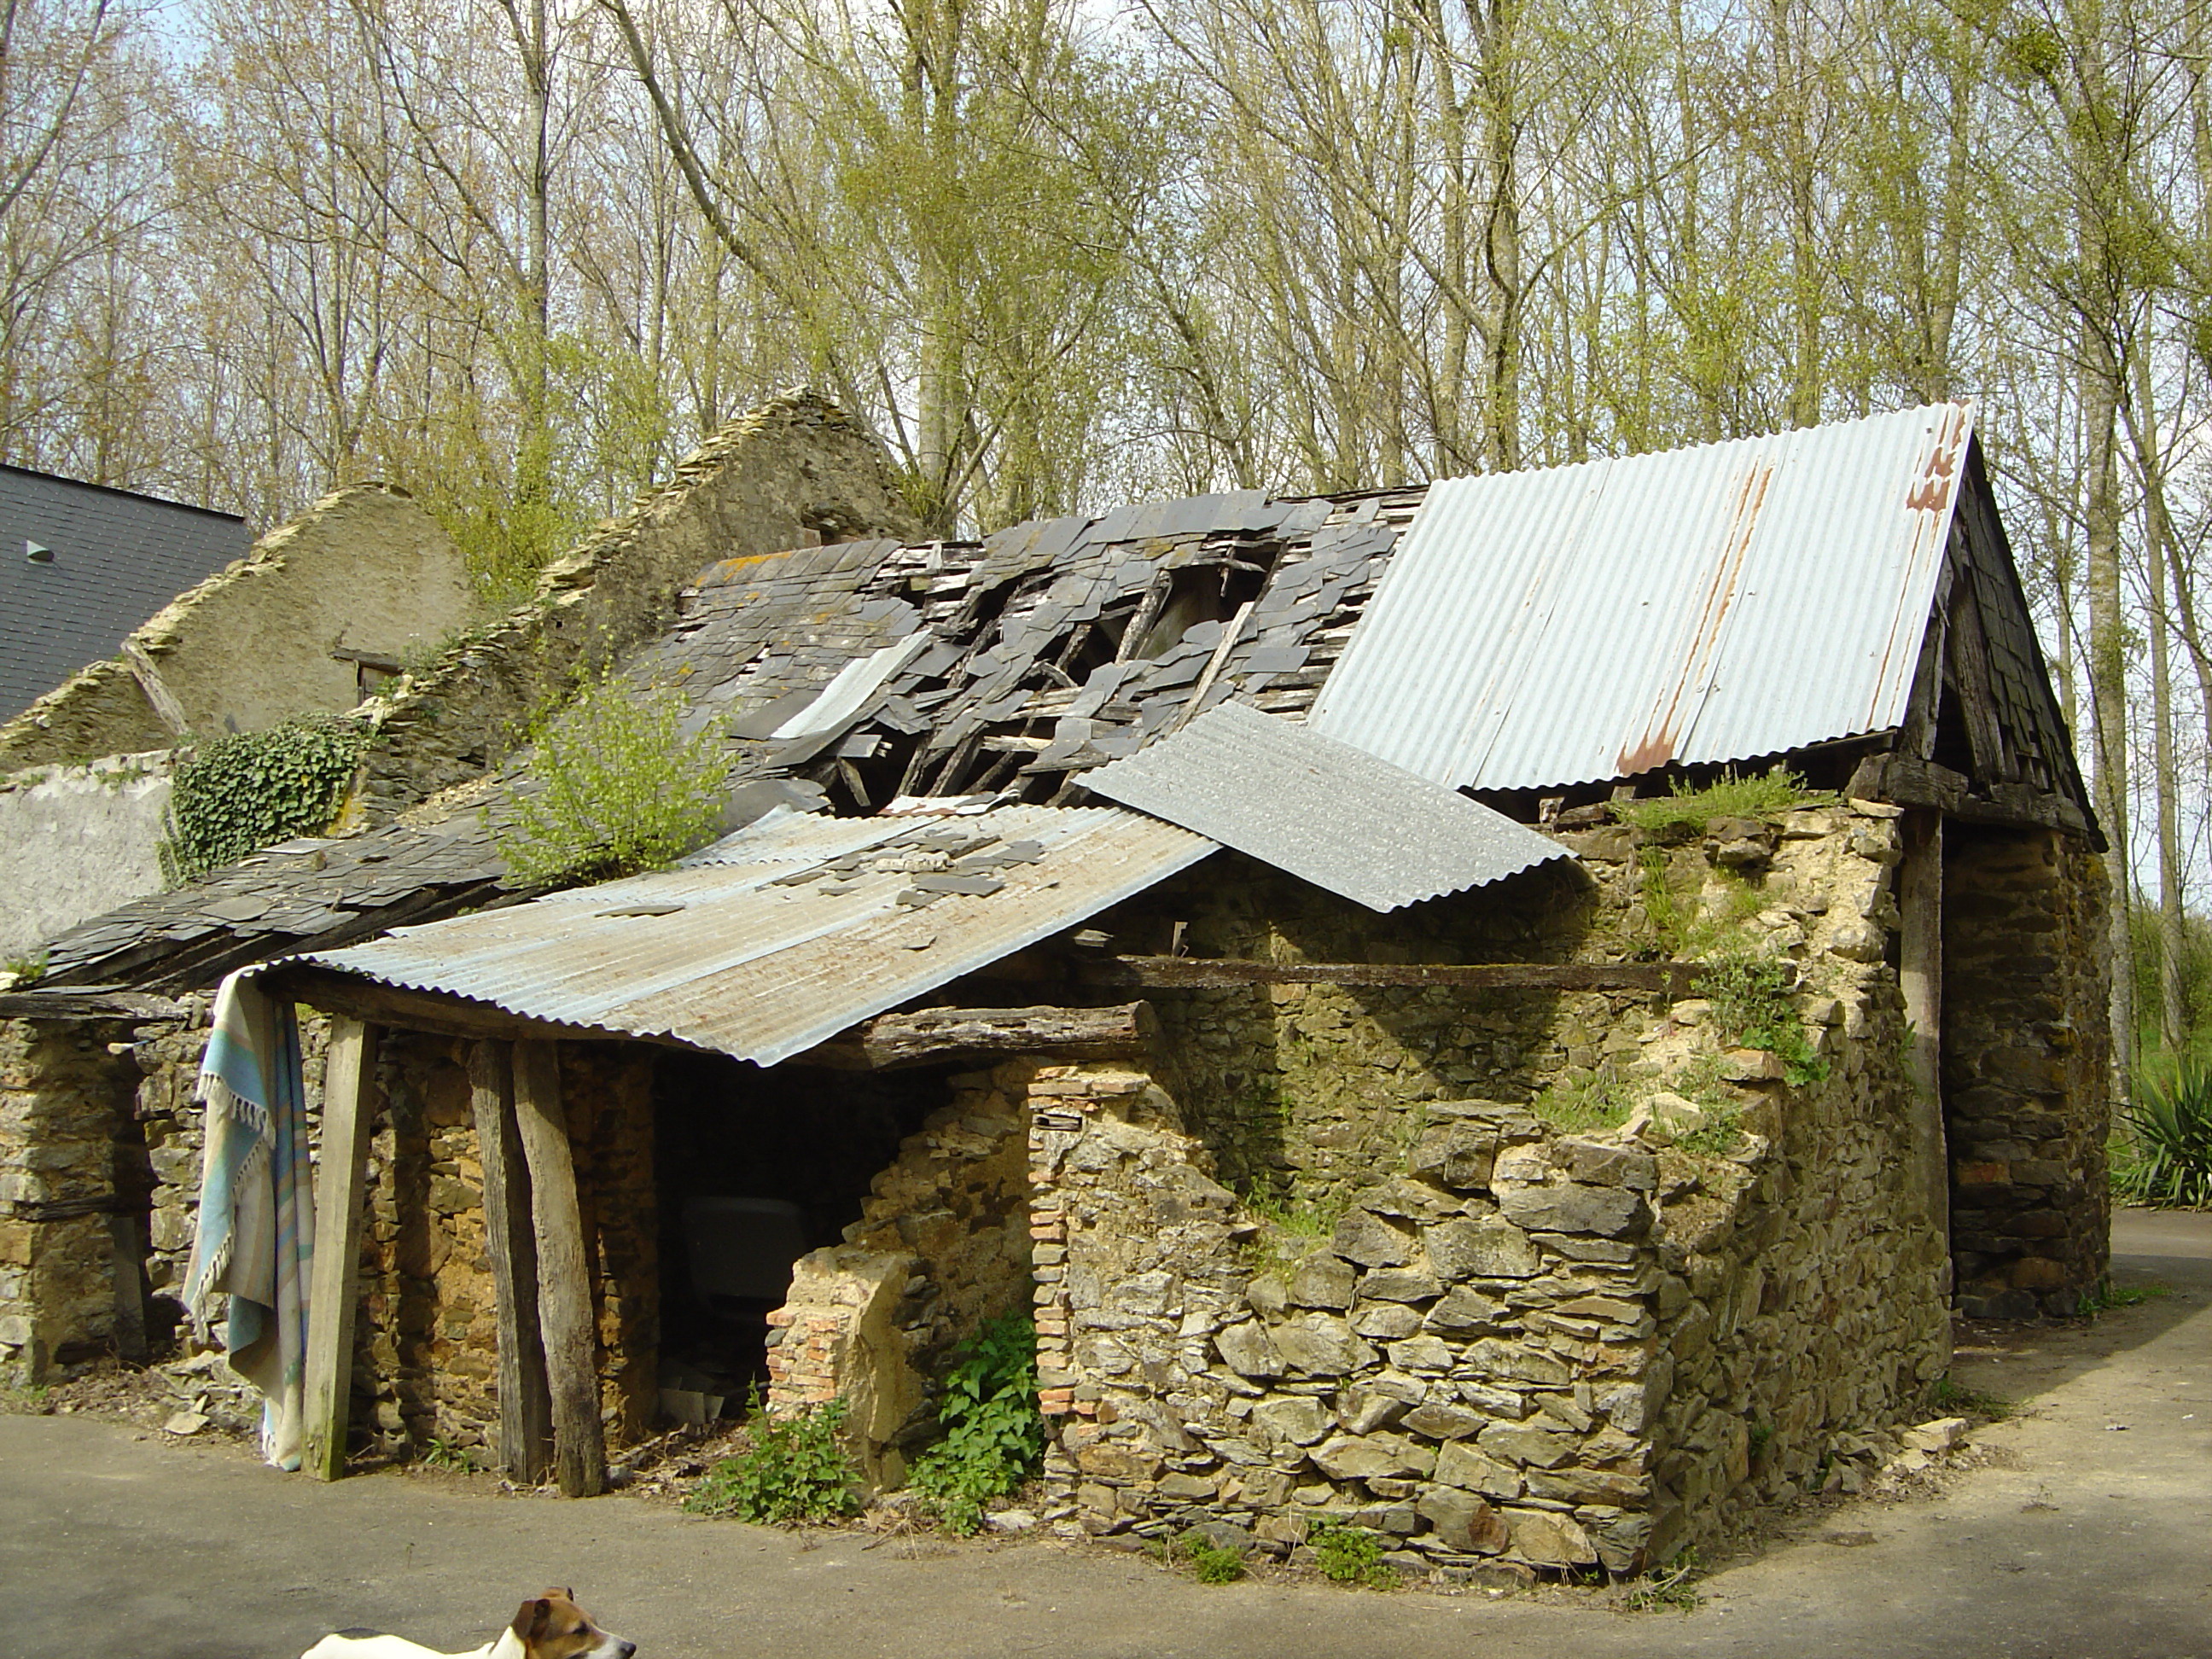
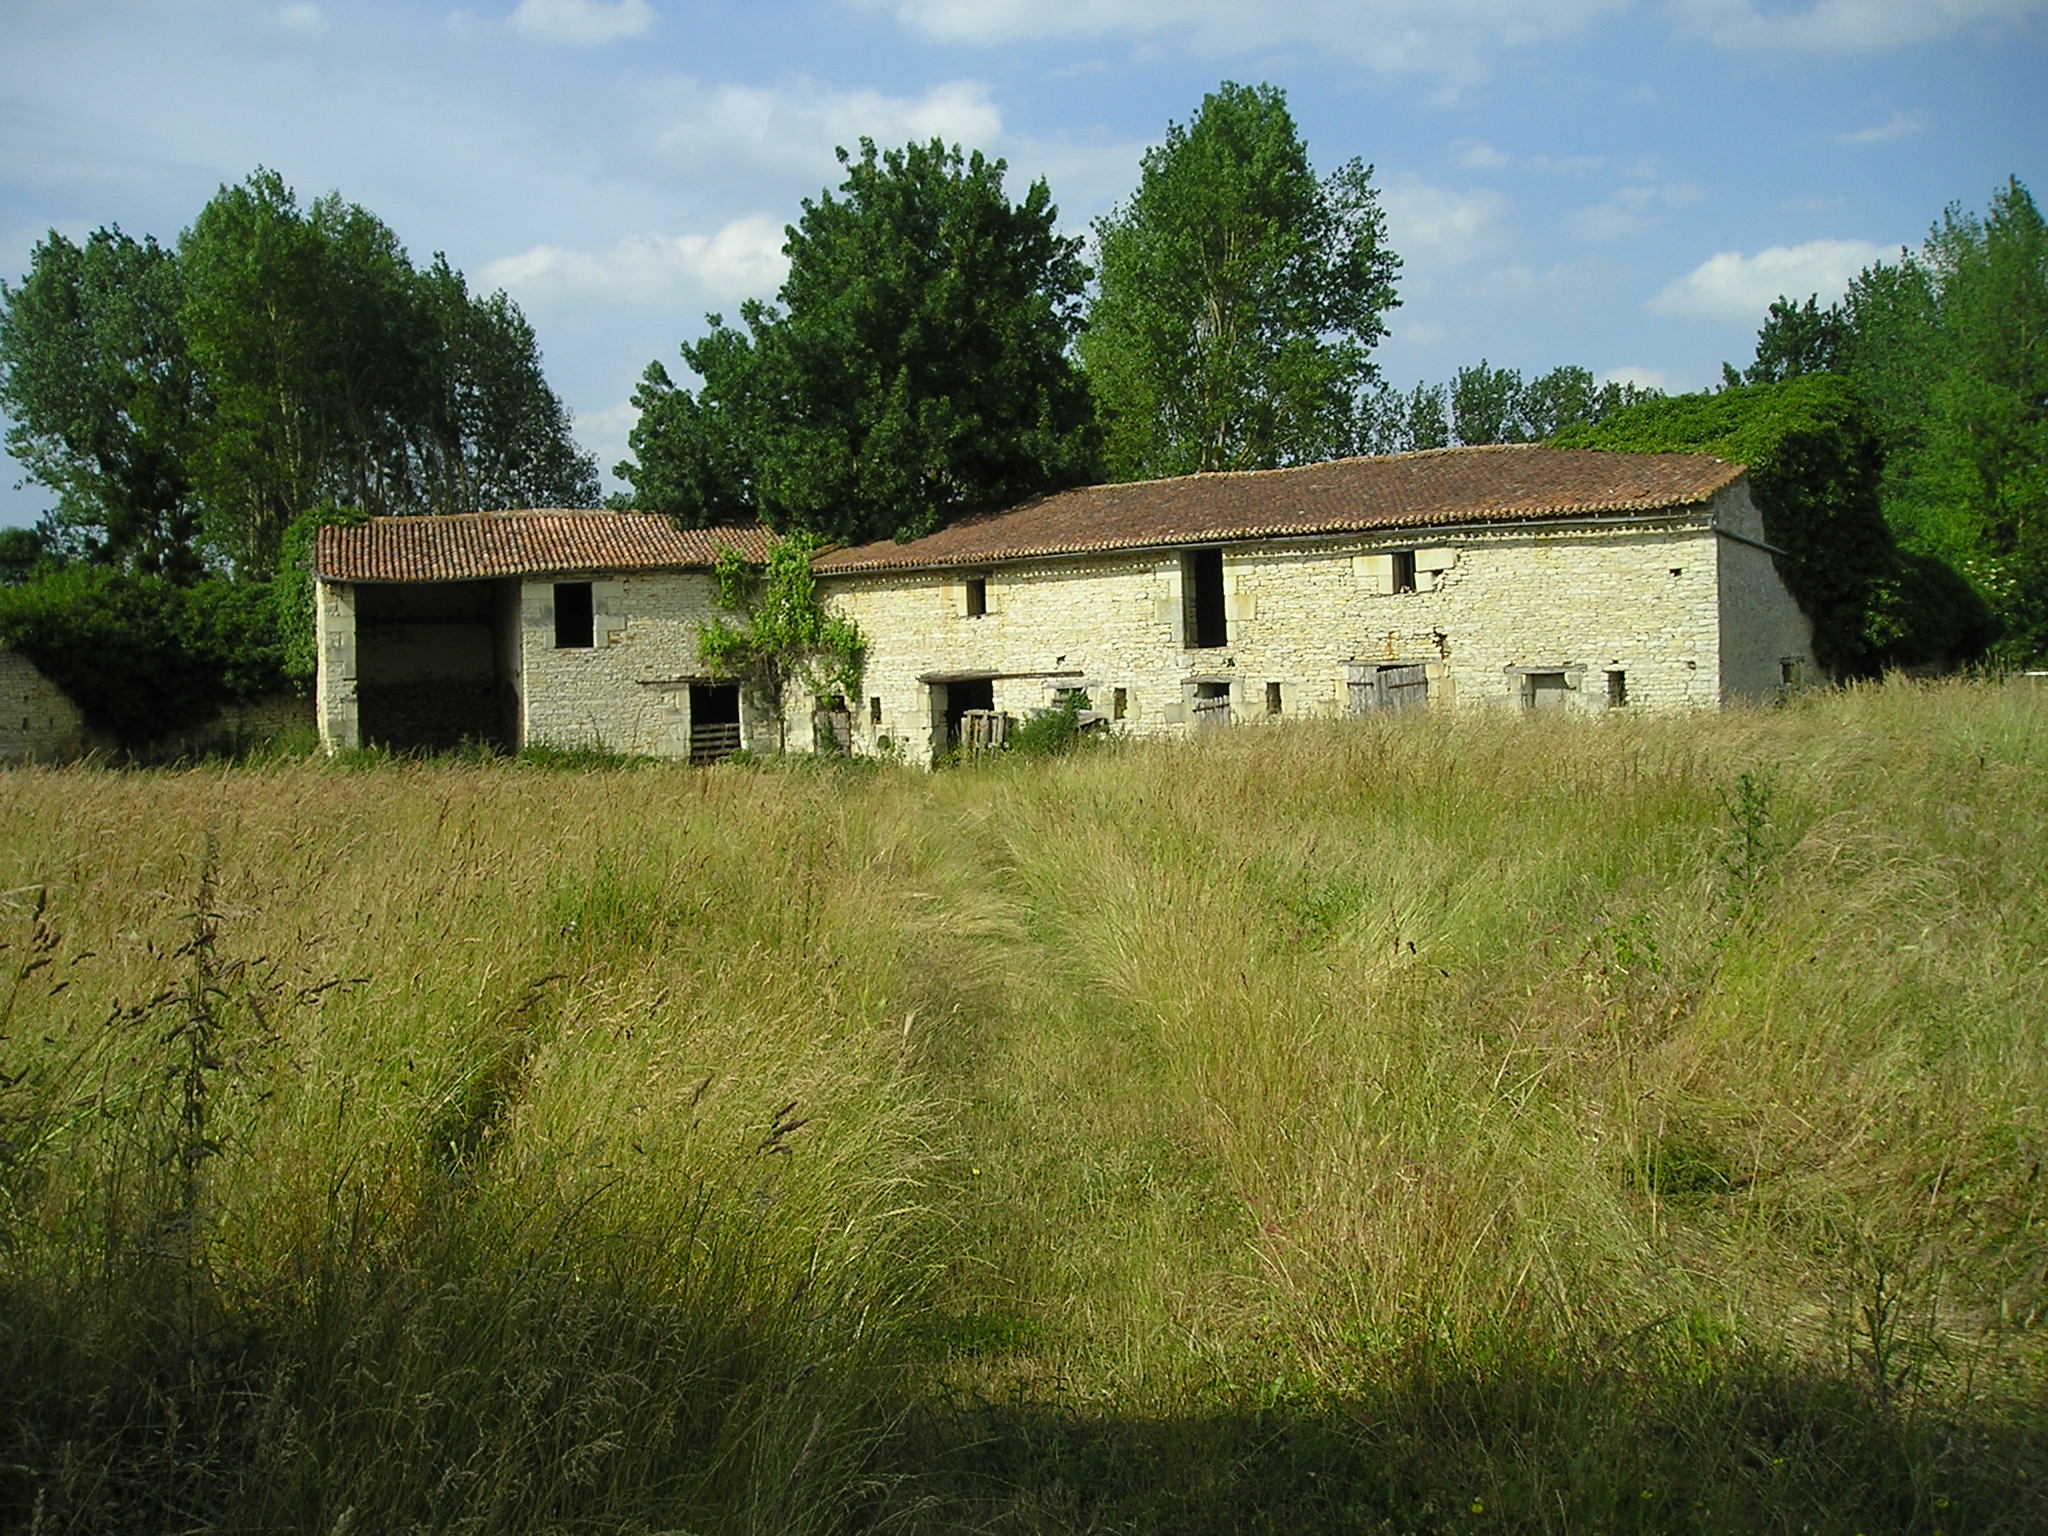
Finding a house to renovate to give us what we wanted was proving difficult. They were either too small, in the wrong place, too expensive or required extensive re-modelling. Essentially a barn is four walls and a roof. As blank canvasses go it’s about as blank as you can get. We were able to start adding to the building straight away, without any real demolition. As a bonus to this we did not have tonnes of rubble to dispose of. This is a good thing. I have seen many converted barns, on television and in reality, where the concepts used for interior design have been fairly outlandish; Pods for bedrooms and bathrooms joined by walkways suspended on wires was one “Grand Design” that springs to mind. We chose the more familiar, traditional route and created what can be easily recognised as a three bedroom, two bathroom family home, albeit a big one. I still have to explain to French people that the interior is converted when they stop for a chat at the garden gate, (maximum audience, so far, 32, a walking group passing through, who were puzzled as to why we were living “dans une grange!”)
Heights of rooms.
Many French properties have attics (greniers) that are low or offer restricted headroom because of beam height, or lack of it. By measuring from the highest part of the existing floor to the underside of the lowest beam in our barn, (5,6metres), we knew we had enough height to create a new ground floor, a first floor frame and upper floor ceiling and still have headroom all the way to the walls. This trick was fairly high on the list of things to check as we knew we wanted a good sized upstairs space to create an open plan, double height, entrance hall, mezzanine area. Having looked at many properties with “grenier amenagable” I feel they should add for the “vertically challenged” afterwards.
Formalities and plans.
If you are contemplating, or indeed have a barn that you want to convert, you must ensure that the required paperwork is in place. At the very least a Certificate d’Urbanisme (Operationelle), this must (can’t stress this enough) must say somewhere, if the intention is to live in it, something like “transformation a usage agricole en habitation” or words like it. I have seen somebody ask to convert a barn, and received all consents to create a better barn, which is not what they wanted. Caused all sorts of head scratching and extra expense. A Certificate d‘Urbanisme is only a document that lets you know what you will be allowed to do “in principle” with your building. Full planning permission is required before any works, conversions can start. This also applies to people renovating properties that change the outside appearance, structure of a house, attic conversions etc. As well as the formal planning exercise there is the incidental planning for things like material requisites, work schedules etc. This needs to be personally tailored to your own circumstances, situation and ability. All I can offer on this one is that you can never do enough of it! Make notes, draw sketches, doodle and generally keep track, then when you’ve done this, do some more. Most will be irrelevant, but the odd bit that saves a) money, b) aggravation, and/or c) pain, will make it all worthwhile.
Health & Safety
Don’t let the title put you off, ‘tis nothing official. In a previous existence I was responsible for 7 workshops, 2 domestic science labs, a central store of machinery and a motor vehicle shop. Not to mention the 11 people who worked in them. My knowledge of the Health & Safety at Work act was well honed in those days, especially when you add into the mix the 1,600, students who used the above facilities, with ideas all of their own on what constituted “good practice”. I am not here to tell you how, what and why of being careful. What I will say is that it is very easy to acquire all the safety gear; hard hat, safety boots, ear and eye protection and gloves. They have a role to play. Your responsibility to yourself and others is to apply the biggest portion of common sense you can to any practical activity and ensure that you are confident and capable in its undertaking. Do all you can to stay safe and well.
Services. Electrics, Water and Waste.
In these pieces I will give an overview and general hints related to the organisation of the services within our barn. It is not my intention to tell others how they should wire-up or plumb their house. Just pass on some things I learnt while doing it for myself.
Part 1. Electrics.
Are not complicated, but are deadly! I cannot stress enough how important it is to seek professional help if you are not competent in this activity. The wiring in our conversion follows the French norms that were current with regard to cable thickness, number of sockets allowed per room and the special circumstances re electric heaters and chauffe eau. These are available as links from another post.
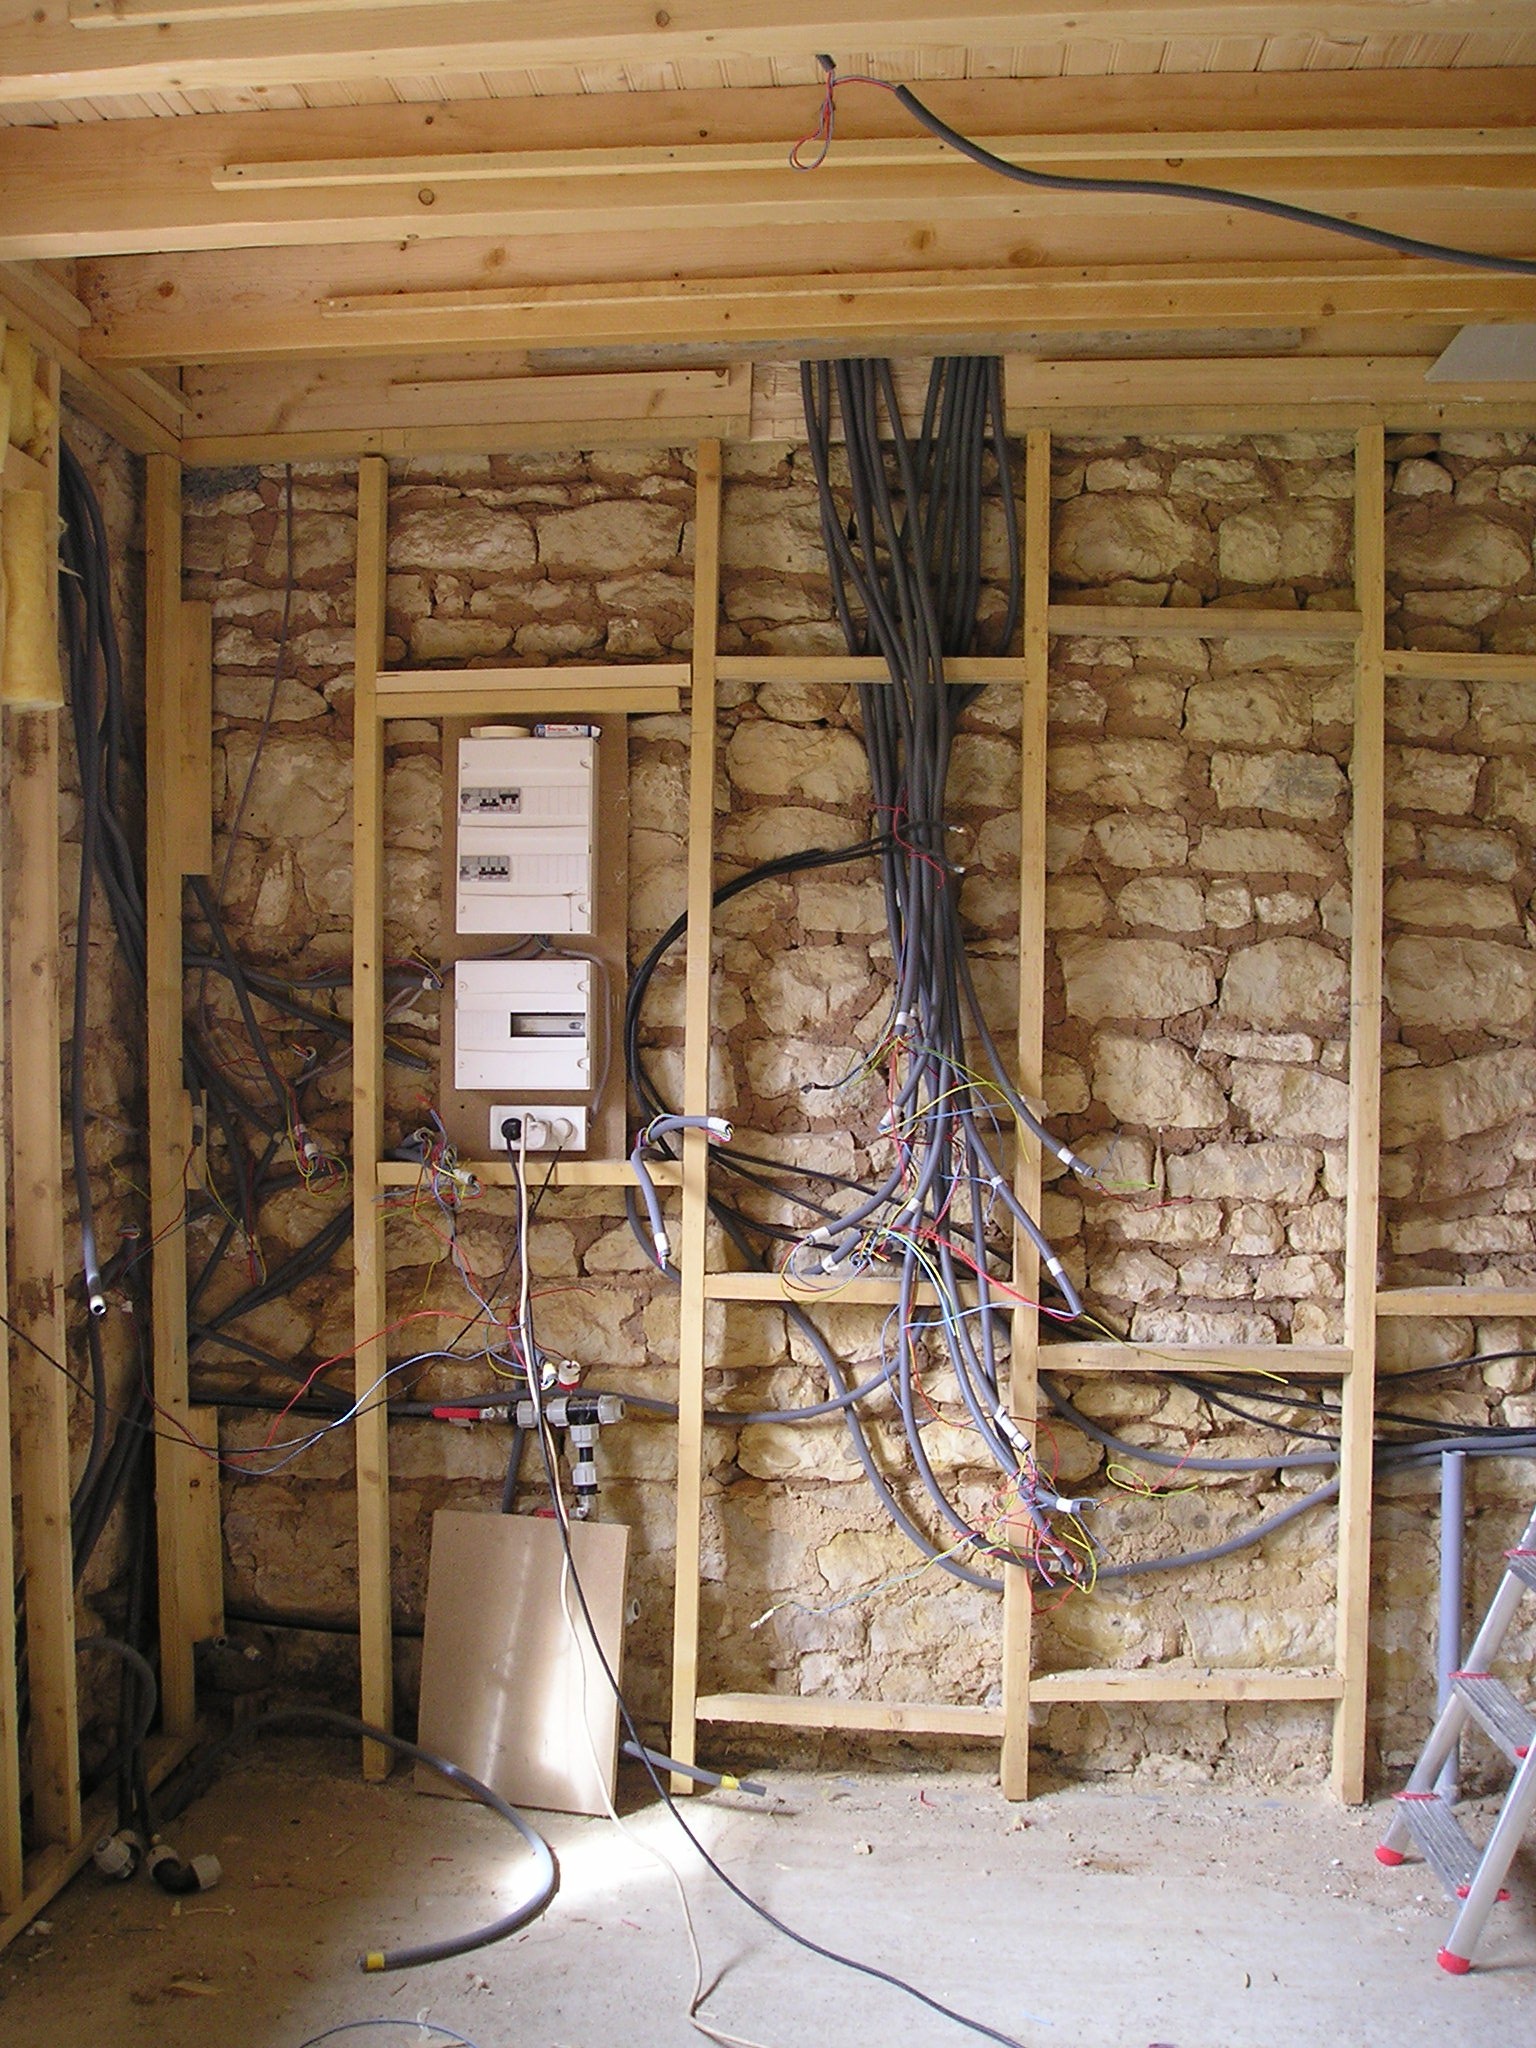
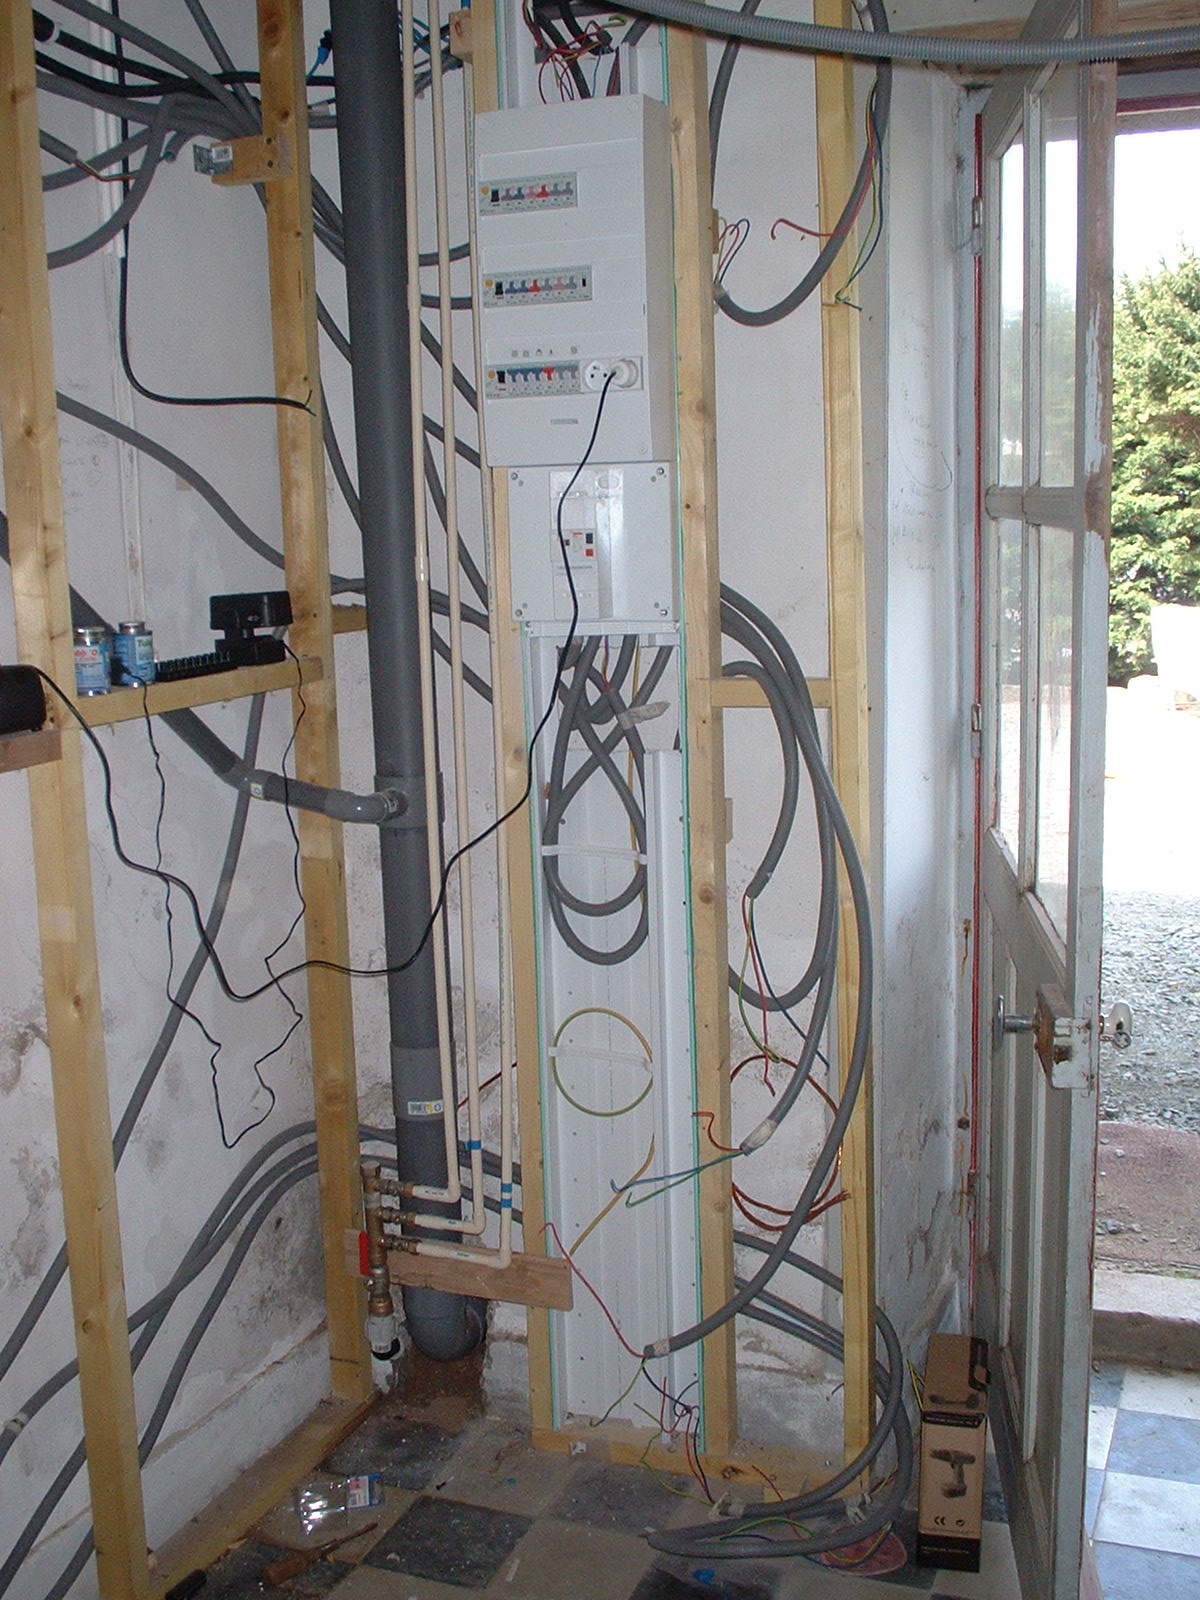
The system of “spurs” that run in gaines from the distribution board to all parts of the house create an amount cabling that is vast. Label every individual gain at both ends with masking tape, and keep a check of where cables are running from. I used the same designations for every room that I had on the plans from the start of the project. The size and number of cables in each gaine will depend on the type of circuit it is. I used 20mm diameter gain most of the time and 25mm for things like “come and go”, two way switches that need more cable. Although not strictly necessary I ran earth cable to all light points just in case they were needed in the future. It may be a long way off, but if you know where you are going to install a satellite dish it is well worth running some gaine from there to the decoder box position. Feeding wires in is a two person operation. One to pull and the other to guide, un-snag and generally make sure the cables run smoothly into the conduit. For longer runs try to make sure as much as possible all curves, bends are not too acute. A good set of lungs is required for all the shouting that takes place!
It is not too difficult to then clip, tie or somehow fix a loop of cable (be generous)in the position of every light, switch, socket or appliance that you envisage having. Try to establish a standard measurement fro things like position of sockets ( mine are 30 cms from the floor), Light switches height and distance from entry door into room, consider which way the doors open. Sockets above worktops in kitchens and position of any “special” sockets, i.e. below counter for washing machine/dishwasher.
Runs for communication such as telephone, satellite cabling and or computers are also to be considered. (Indeed new norms dictate they are now part of a standard house wiring.)
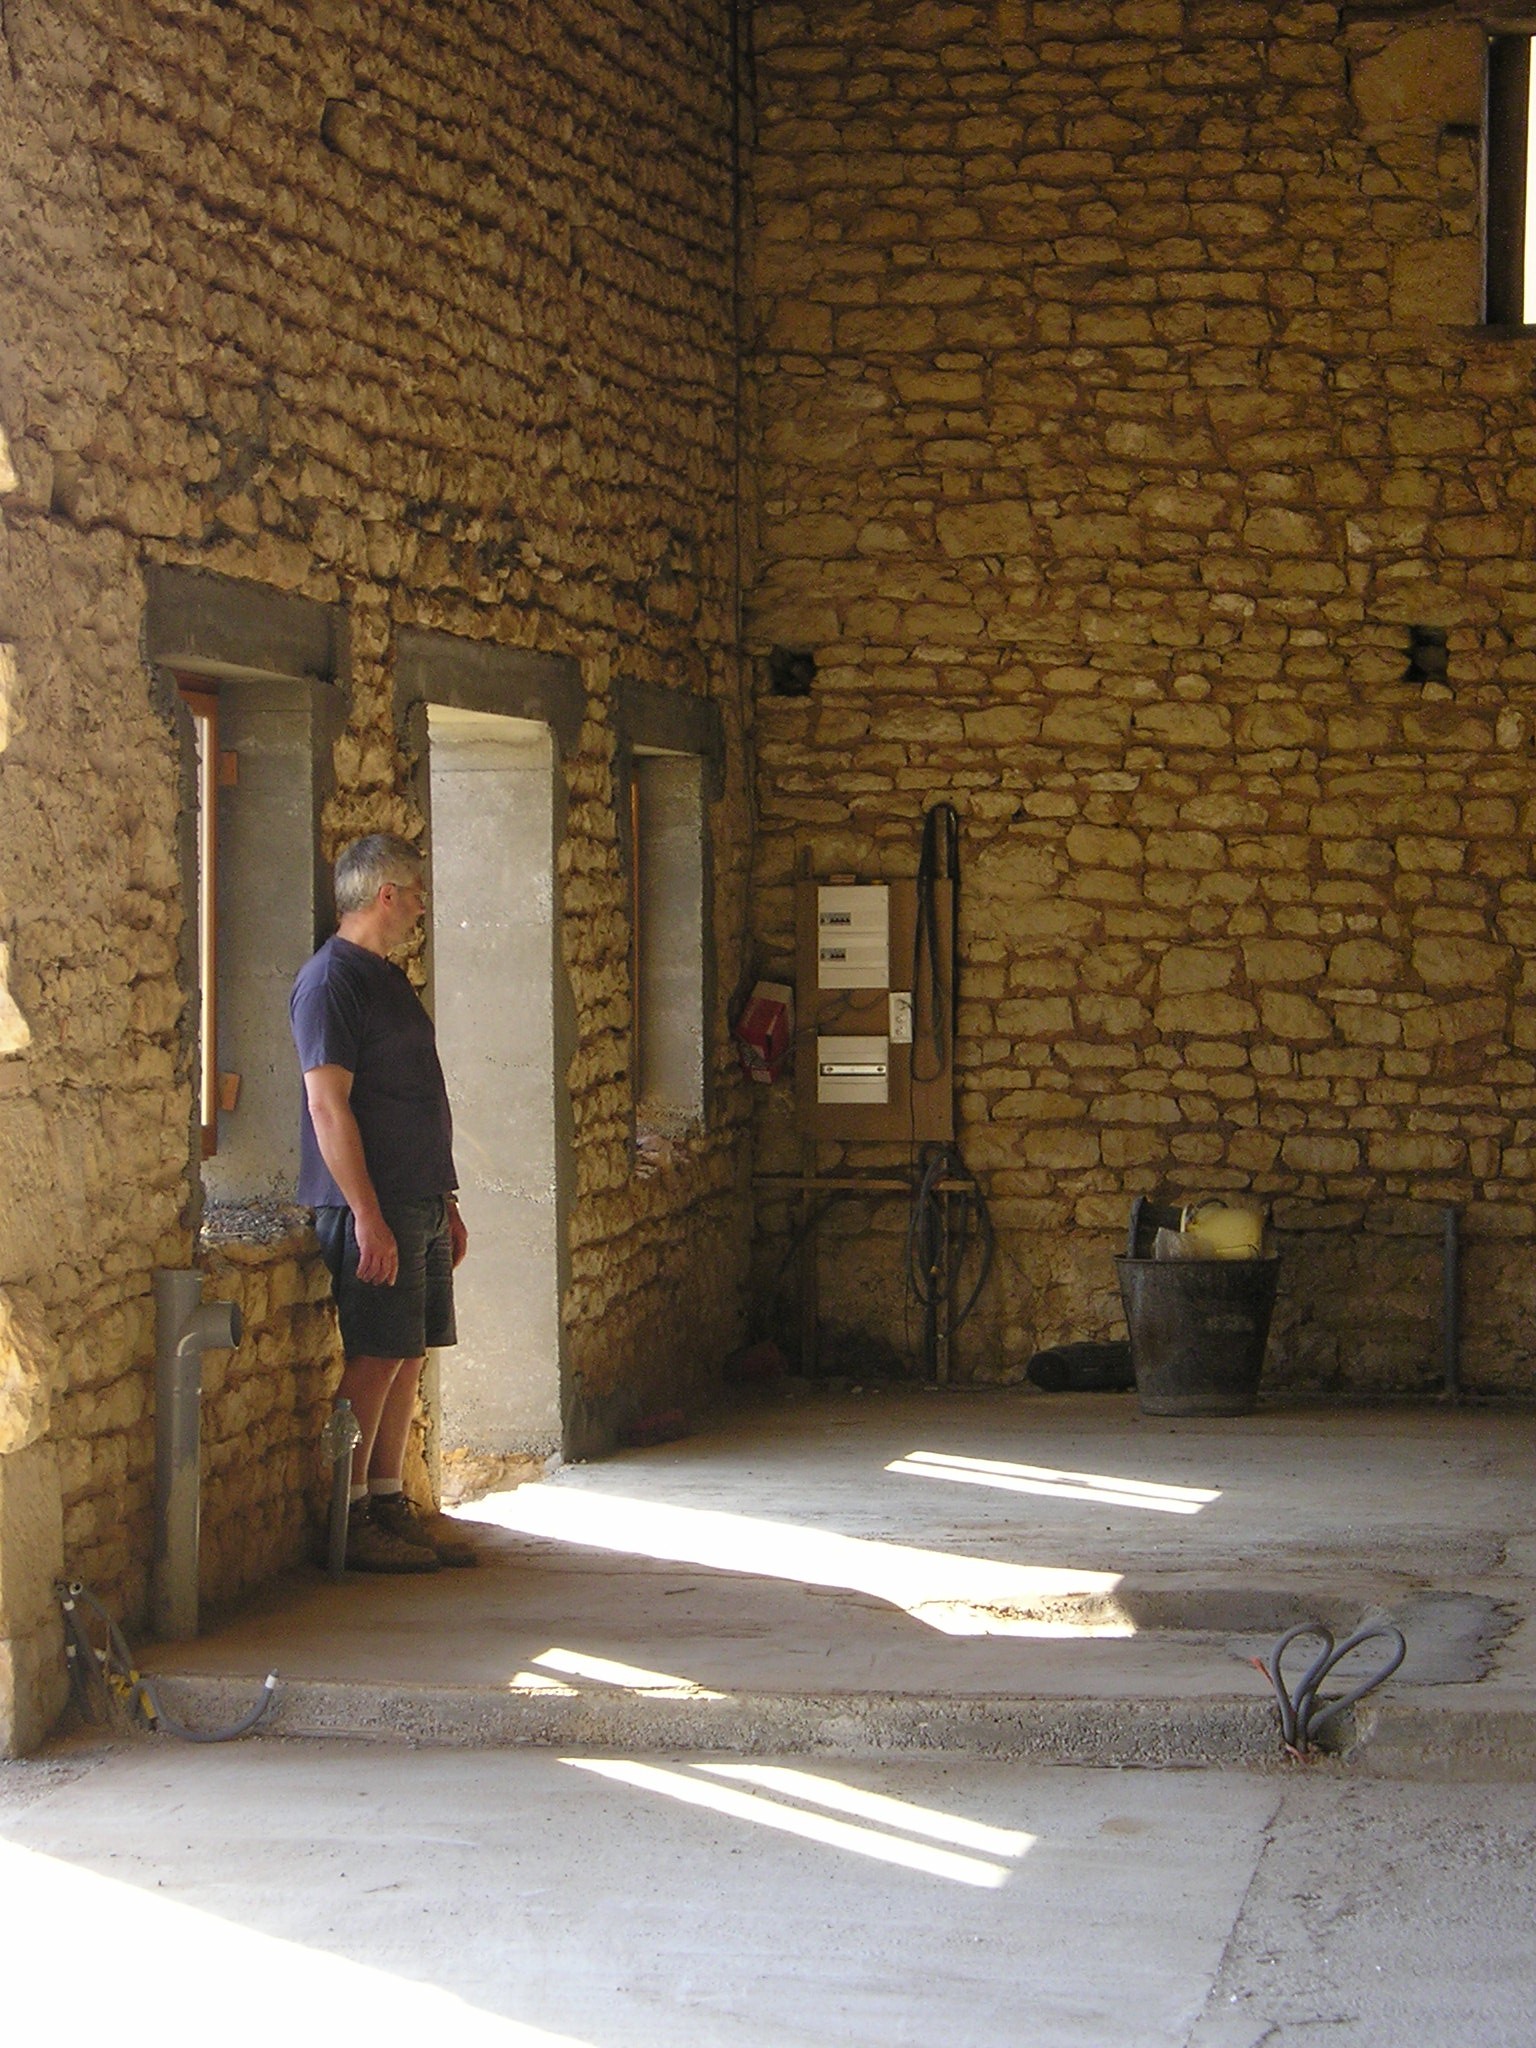
I made all the connections for sockets, lights, switches and heaters. I then paid an electrician to wire all the individual circuits into the distribution board. At this point he checked all ratings and earthing for me and all sockets etc. I then asked the local electric board to come in and change the meter and install one of their wall mounted meter reading boxes, and, at the same time changed my tariff to the heures creuse option for overnight, cheap rate supply. While they were there they did an earth check and gave the whole installation the “once over”. Not exactly a “consuel inspection” because my installation was not a new one, but they were quite happy to have a look for me.
Electrics, wiring can be fiddly and frustrating. They need careful handling but do fall into the realms of DIY if you are capable, careful and methodical. If you are in any doubt about your competence or ability, pay someone.
Services. Electrics, Water and Waste
In these pieces I will give an overview and general hints related to the organisation of the services within our barn. It is not my intention to tell others how they should wire-up or plumb their house. Just pass on some things I learnt while doing it for myself.
Part 2. Water and Waste
The amount of damage water can do should not be underestimated. Plumbing is a specialised activity and if you are unsure of your level of aptitude or lack confidence with this aspect of renovation/conversion work, call in an expert.
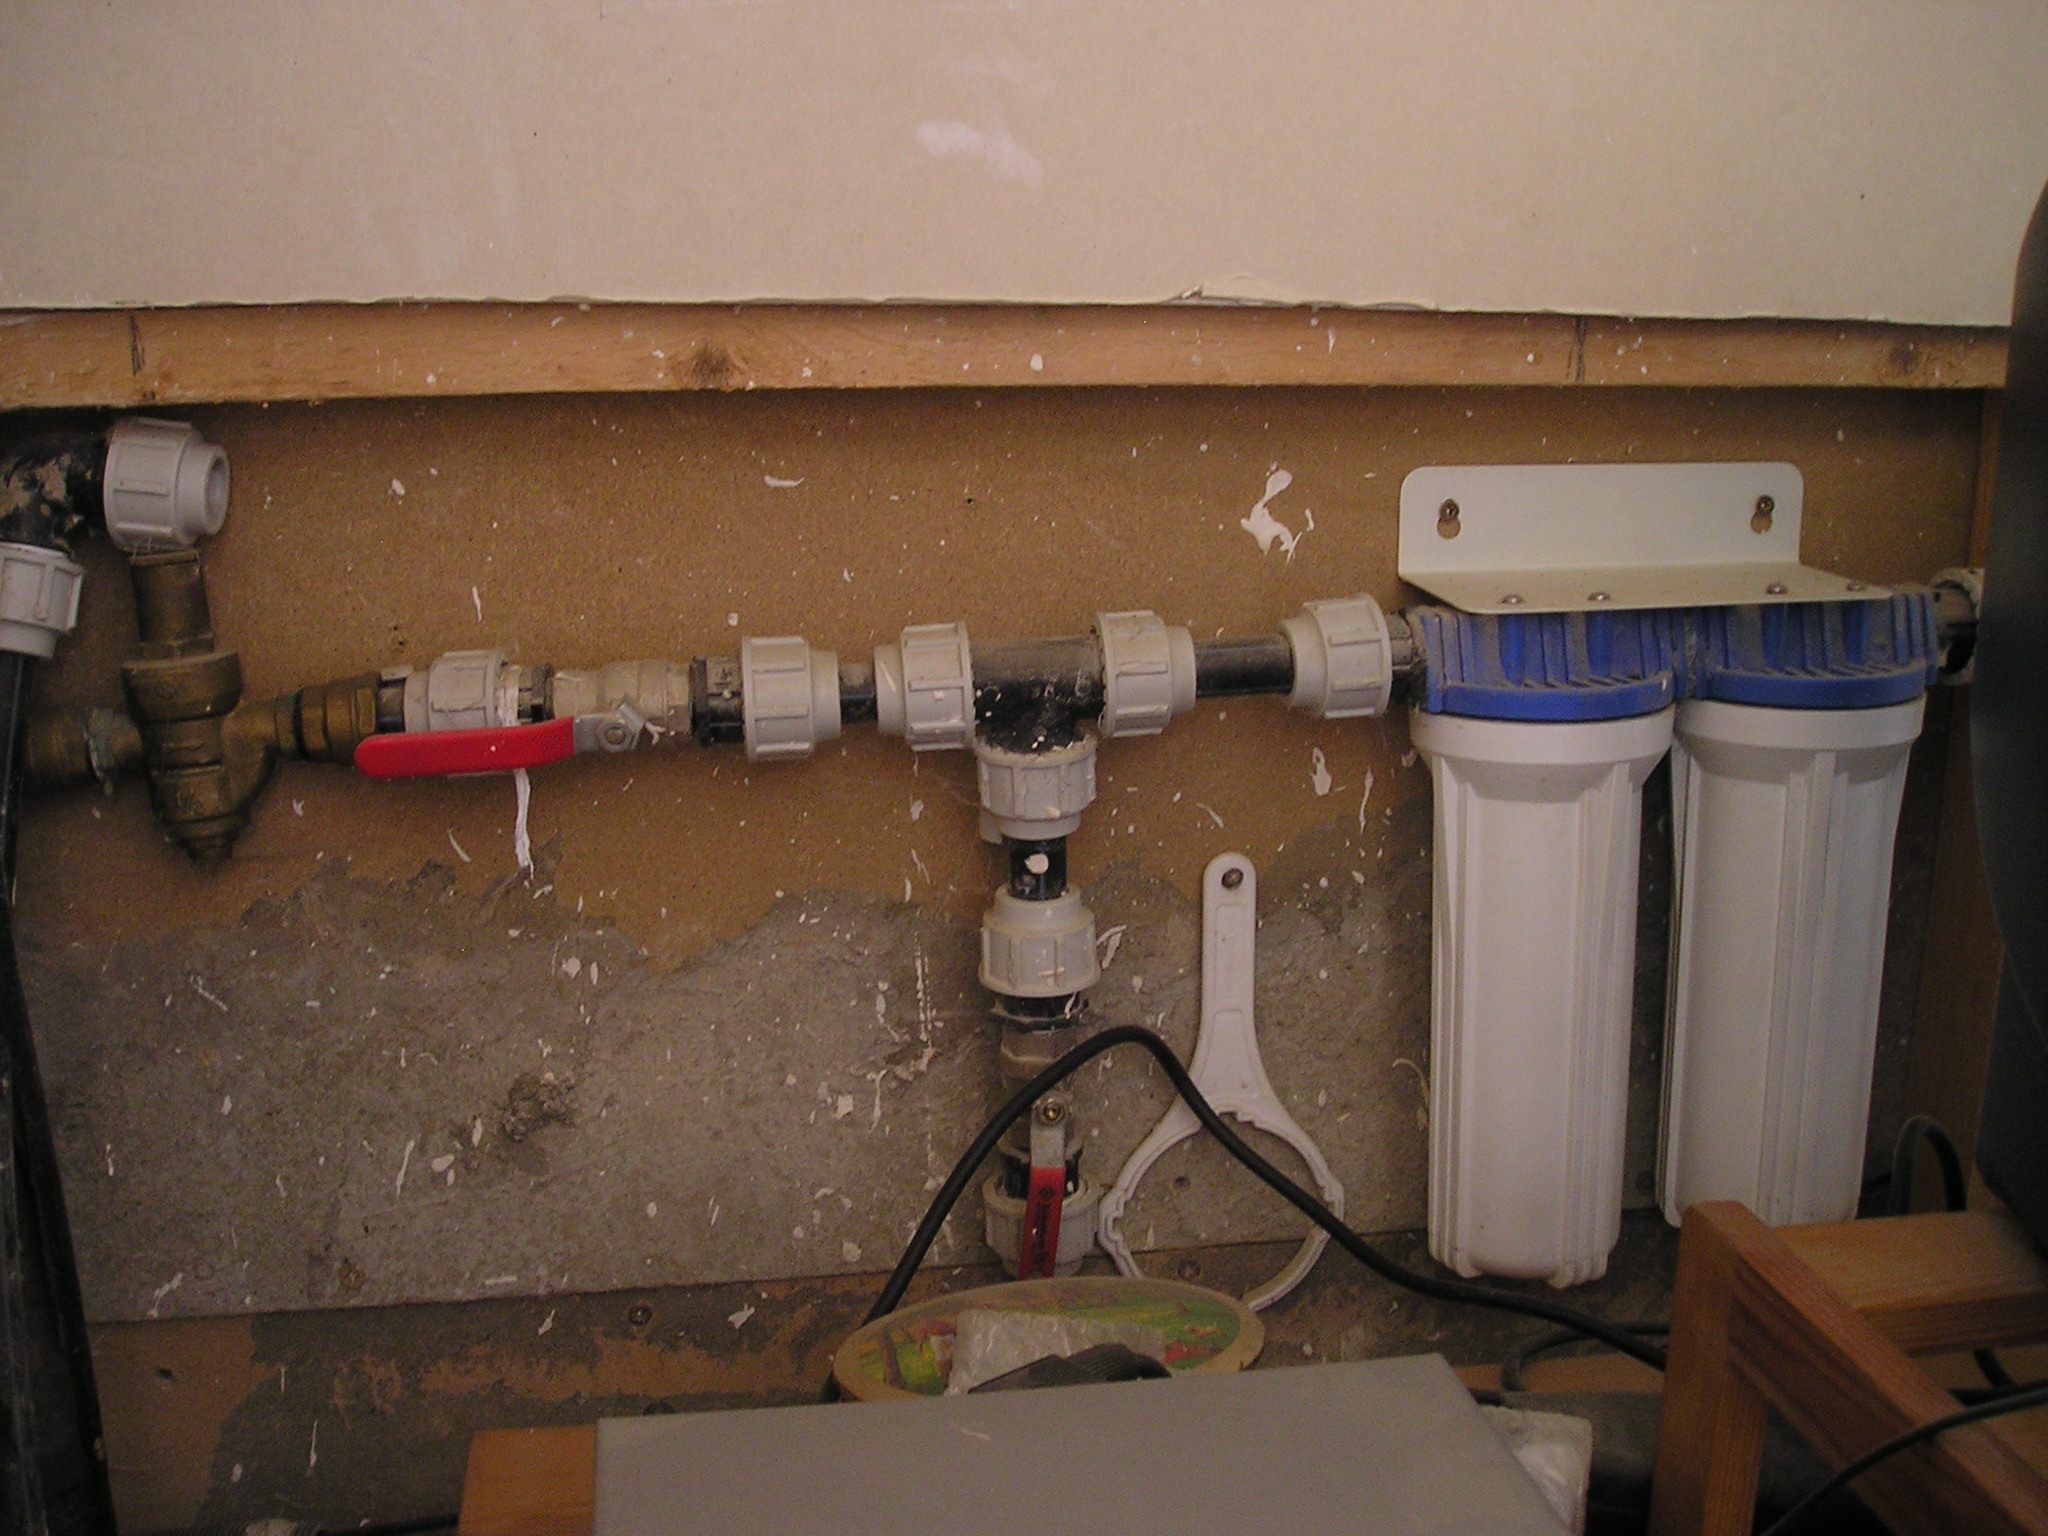
In theory water enters a house cold via a pipe from a meter. How you get it there and how its use is organised is up to you. Everything after the meter is your responsibility. It is possible you may have the option of using mains or a well as a supply. We have access to both. This has led us to have a dual-system running into the house. Mains water in France may be of a higher pressure than you are used to. We have run ours through an adjustable pressure regulator. This prevents all sorts of problems re water heater overflow, tap leakage and cistern “running-on“. We have also incorporated a filter system just after the entry point into the house and both systems can be run together or independently. Watering the garden and loo flushing are two expensive uses of mains water.
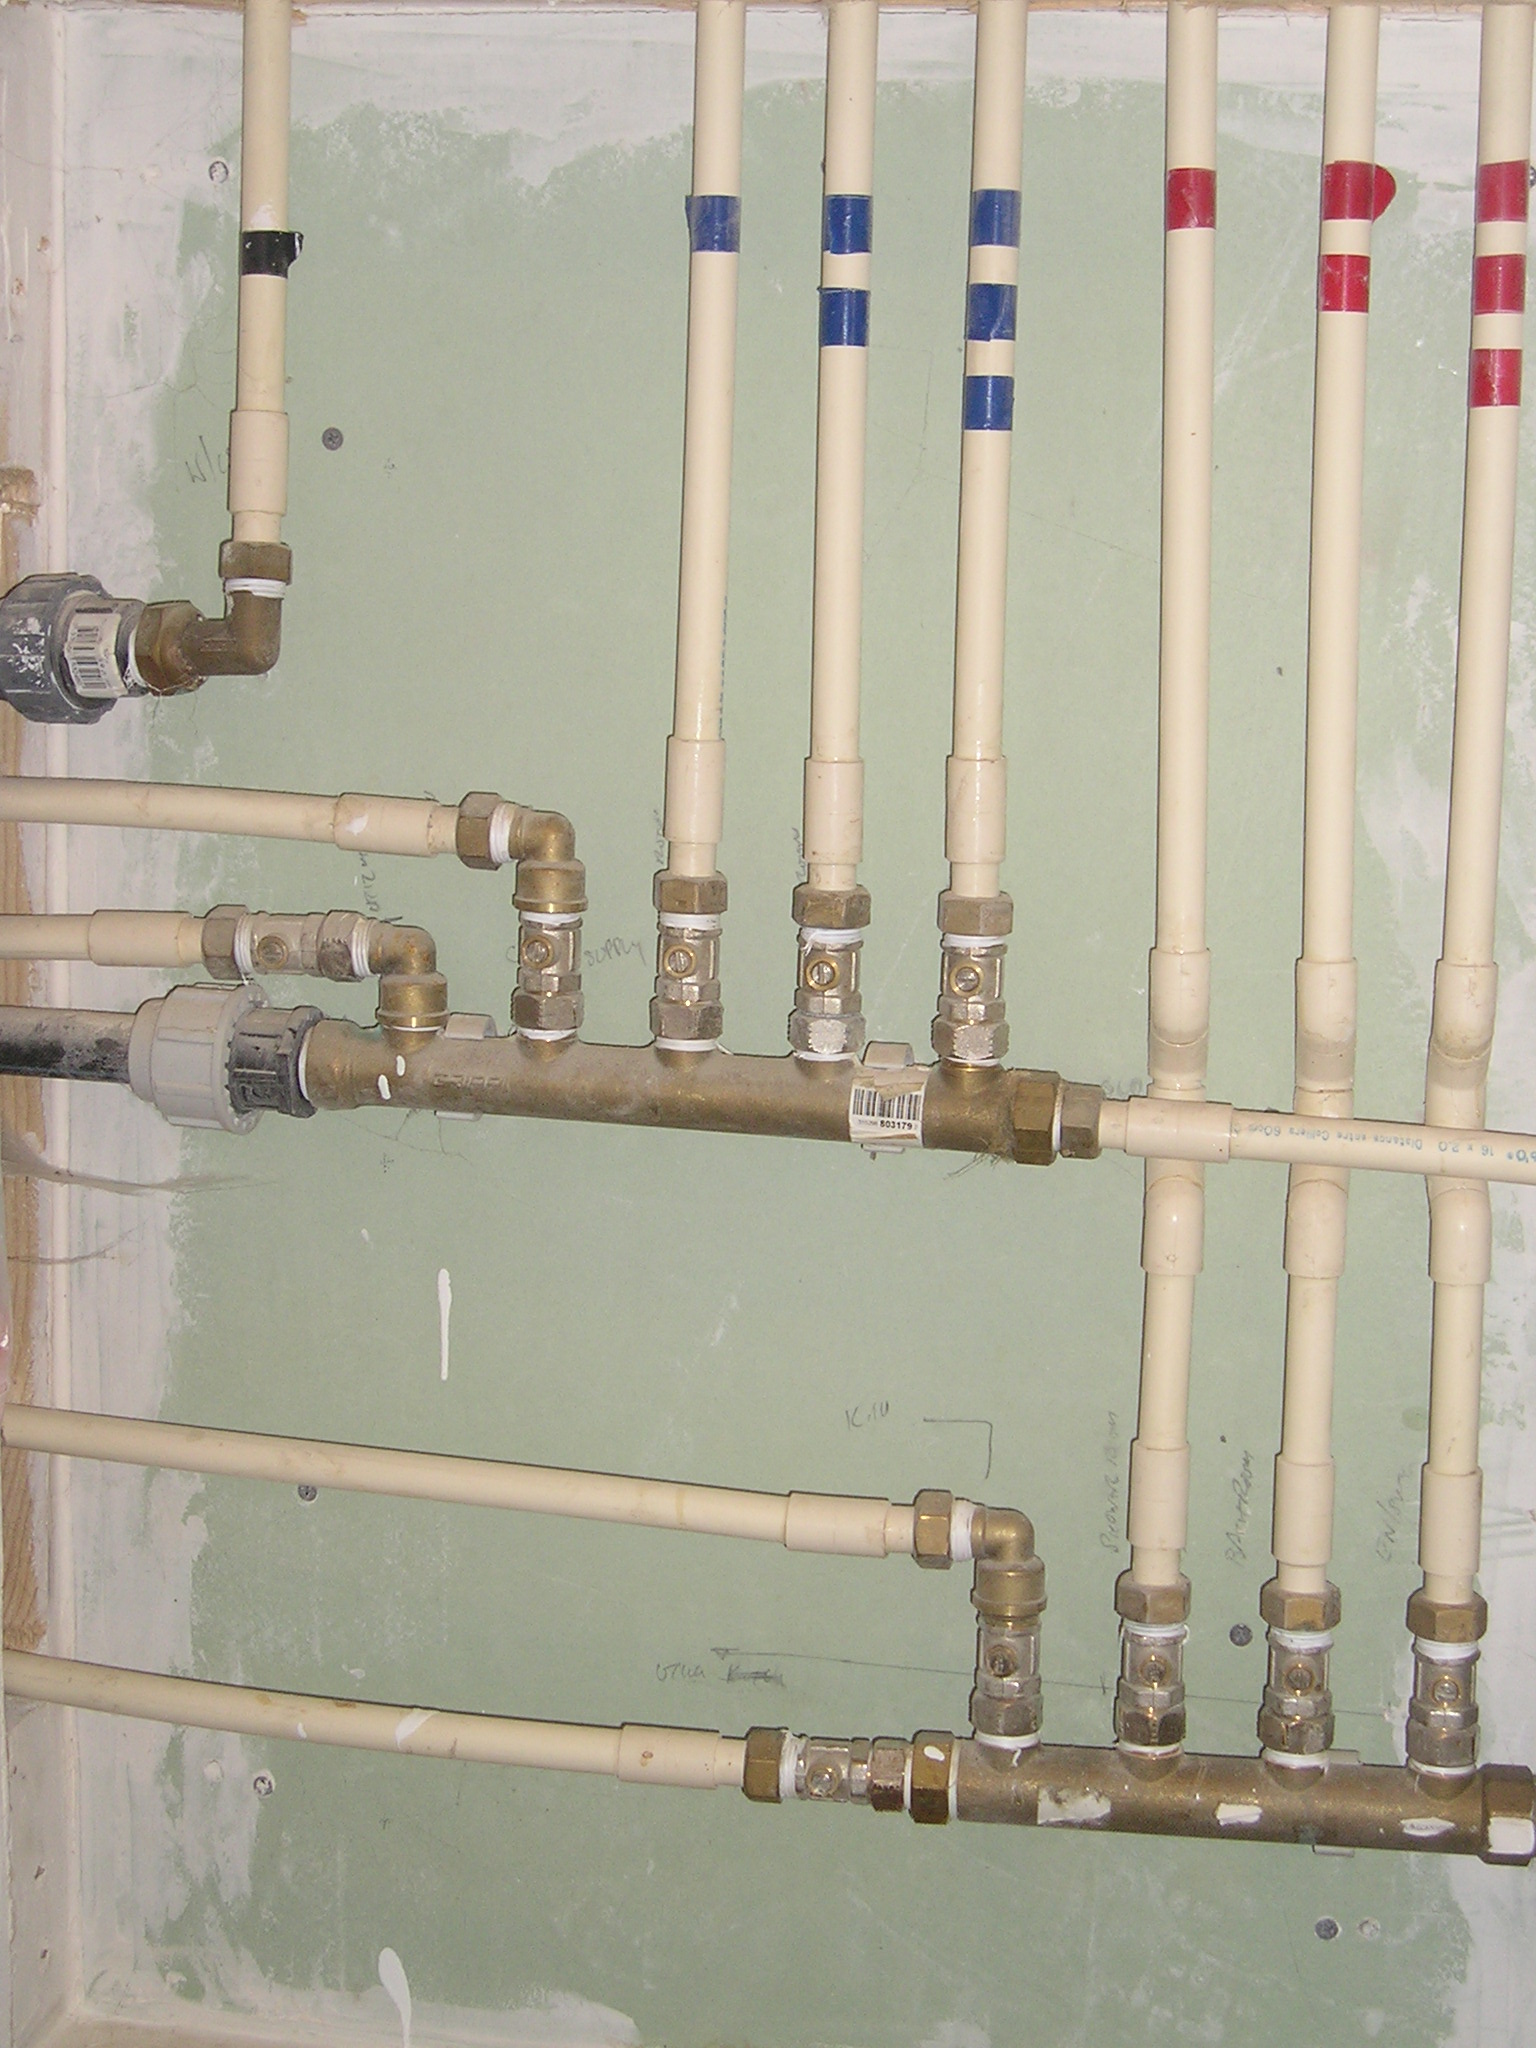
Once the supply is in the building how it’s dealt with is subject to individual requirements. In order to make life easier for ourselves we dedicated supplies to the hot water heaters (X2), and then to the areas that we wanted hot and cold water to; Kitchen, Utility room, Bathroom. Shower/wet-room and En-suite for master bedroom.
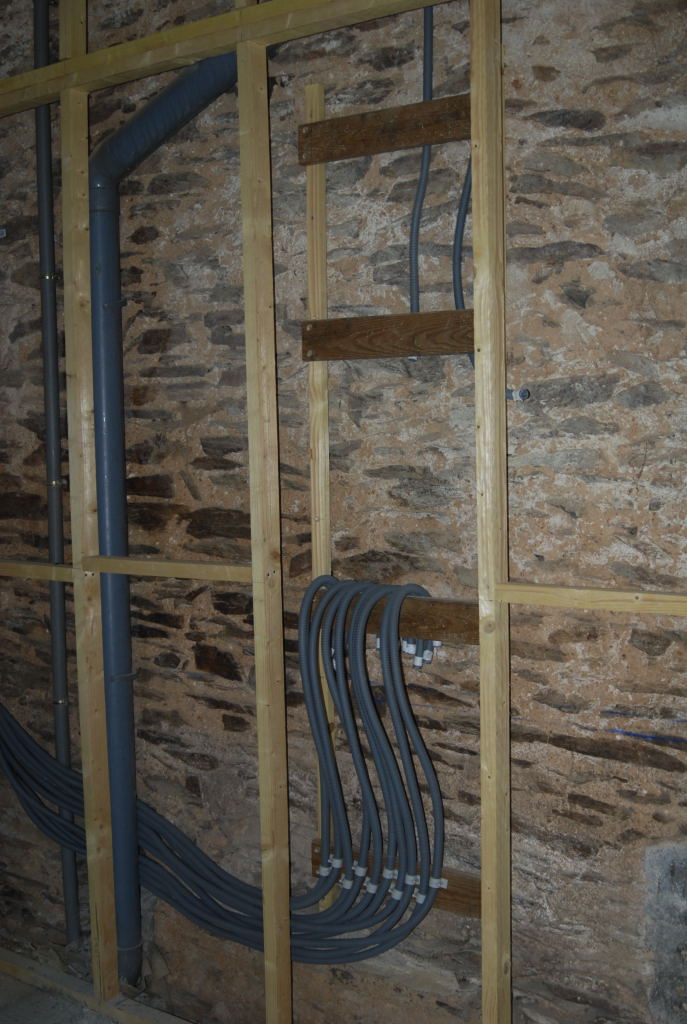
We installed two 200 litre water heaters. They are completely independent from each other. The idea is that when the house is full both tanks can be heated overnight (heures creuse) and when not we only need the one tank of hot water, works so far. The image shows the central distribution point for hot and cold supplies to the various areas in the house. Each supply, both hot and cold, can be isolated from this point. The toilet cisterns all have individual stop taps on them. This makes plumbing, working on the system a lot easier.
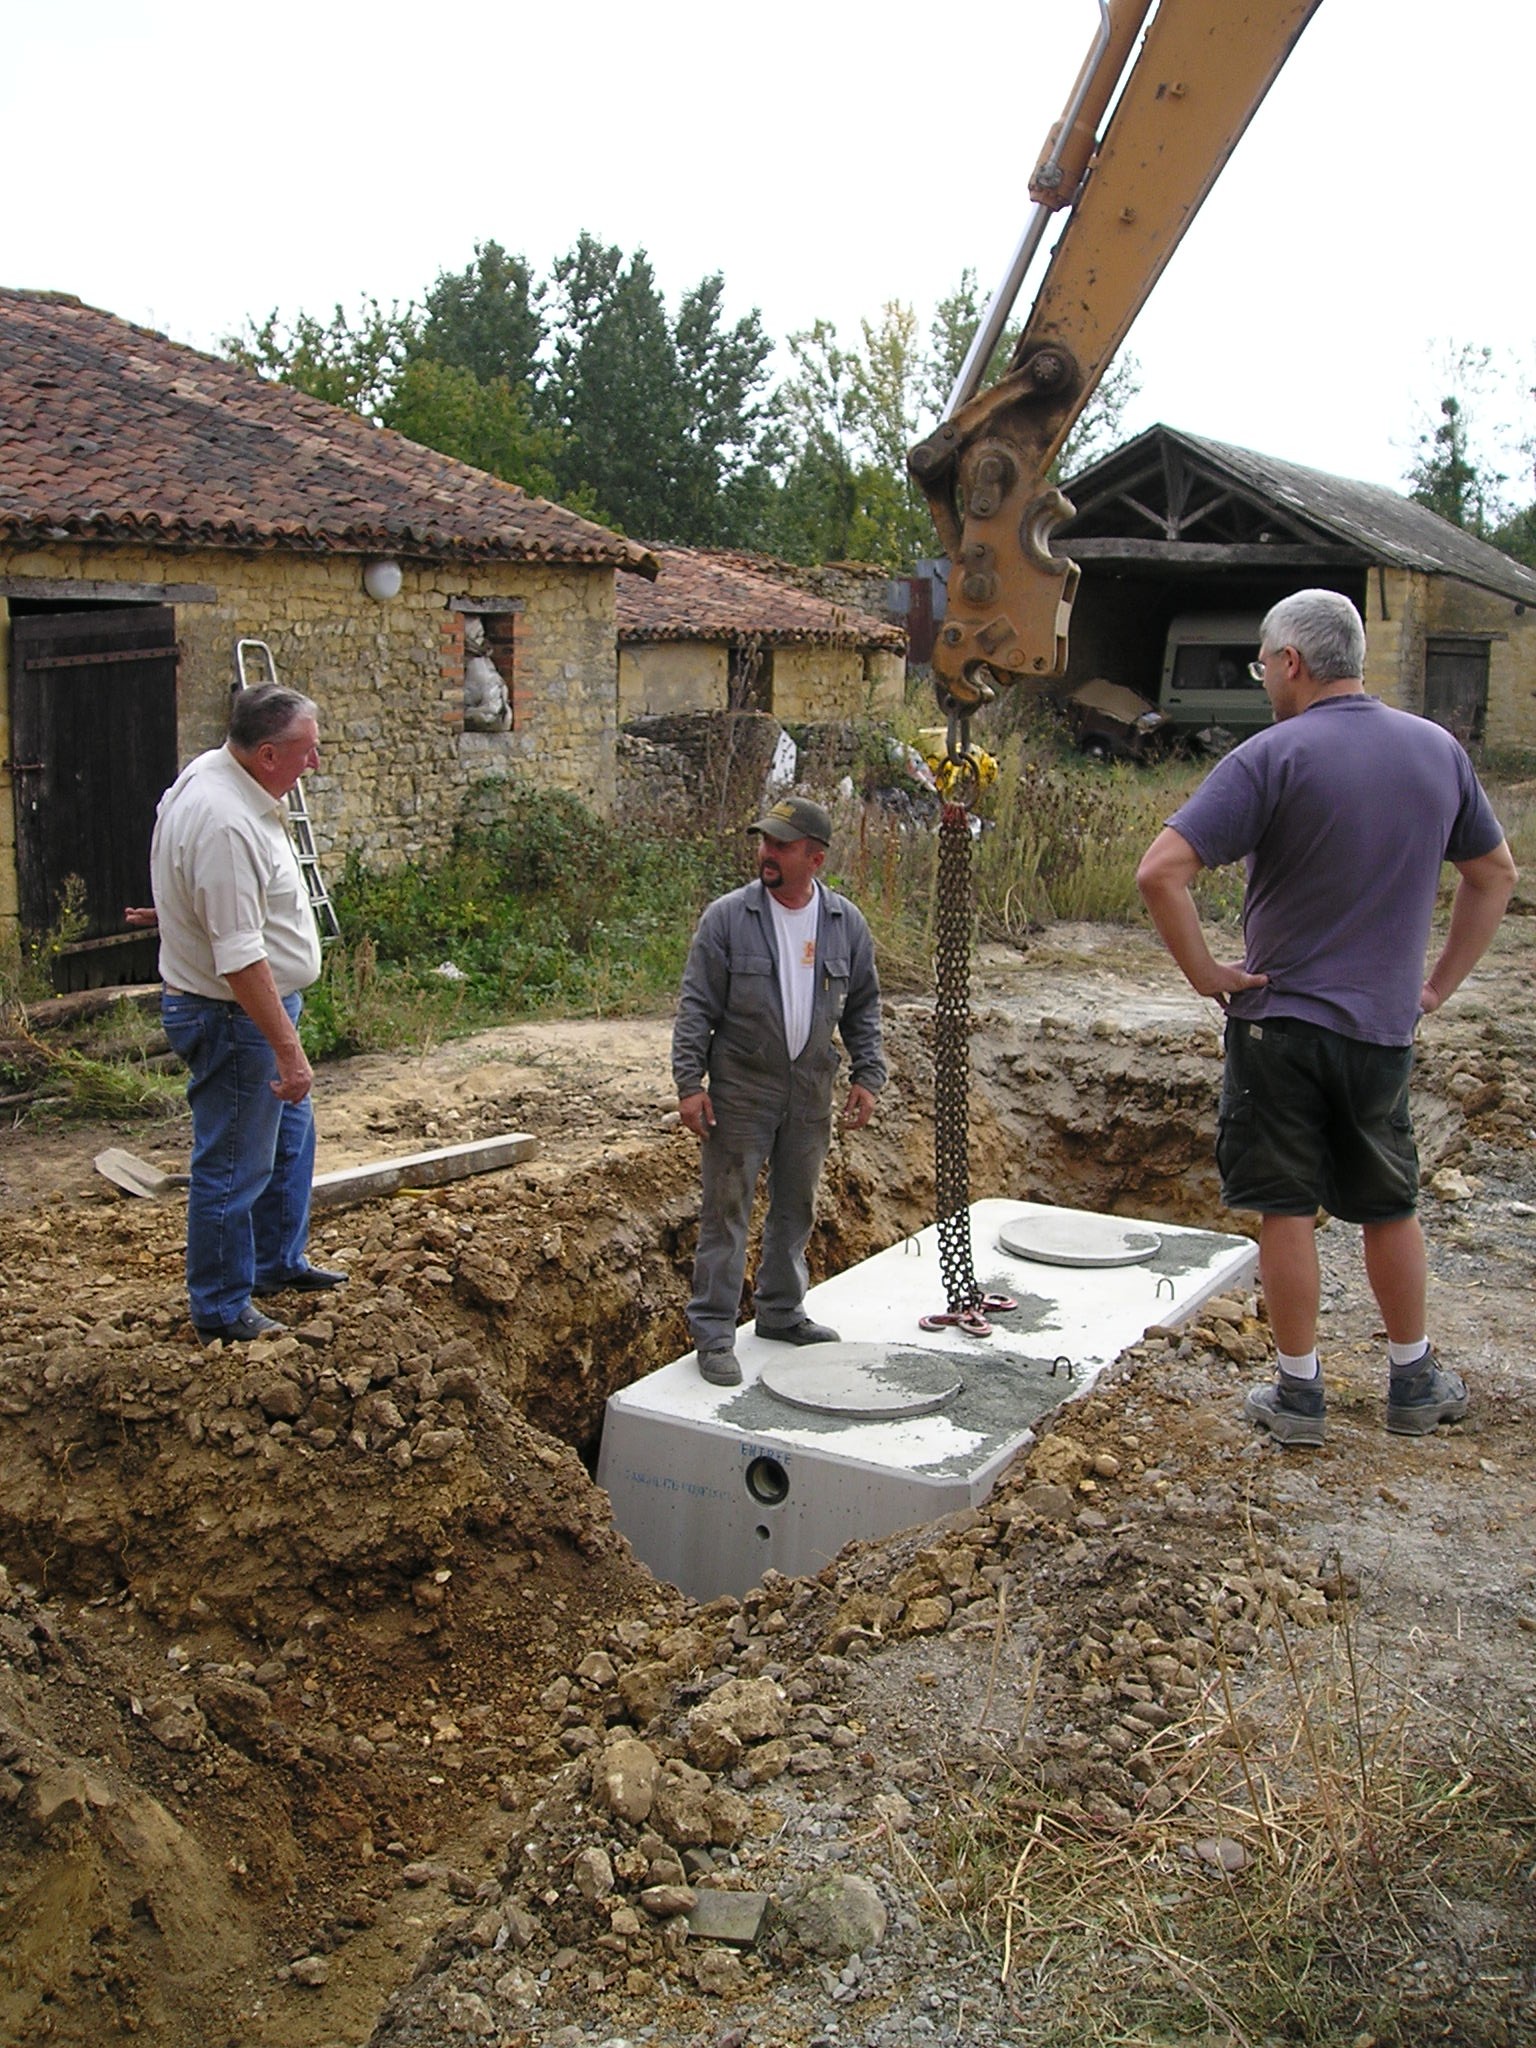
The system for treating waste water involves the use of a Fosse Septique. Ours was a 3000 litre coupled with a soak away created in the garden. The regulations, specifications and control of this piece of equipment is a chapter all to itself. Suffice to say these rules are strictly applied and recommendations must be followed.
Our fosse was installed by a local enterprise and the control of the system carried out by the local authority.
All wastes are standard sizes all over Europe. The various diameters of pipe-work from each. sink, shower bath and WC is standard. To make water,(and other material) flow it makes sense to have it running down hill. The level of gradient has to be at least 1 in a 100. I also converted, upwards in size, as quickly as possible from the smaller diameter wastes to make sure air could flow back over the contents of the pipes to prevent U bends and wastes being emptied by suction.
There is a certain logic to plumbing and it can be a rewarding DIY process.
I would suggest that if you are in any doubt re ability or confidence with this sort of activity get in a professional.
Recent Comments